Lighthouse Report encourages users to serve images in next-generation formats such as WebP and AVIF [1], Compared to traditional formats like PNG and JPEG, these file types can help you improve loading times and provide a better user experience (UX) on your website. However, you may not know how to add this functionality to your site.
The good news is that serving images in the next-gen format is easy in WordPress. In some cases, you may only need to update your version of WordPress. Alternatively, you may prefer to install an image-optimization plugin to automate the process.
Why Lighthouse recommends that you render images in next-generation formats
Lighthouse is an automated, open-source tool provided by Google. It is designed to help you improve the quality of your website. You can use it to get information about the performance and reach of each of your pages.
You only need to provide a URL to Audit Lighthouse. You will then receive a report telling you how well your pages performed. If you fail any of the assessments, you’ll also get advice on how to fix underlying issues and improve your website.
Navigating is the easiest way to use Lighthouse PageSpeed Insights, Once you have run your site through Lighthouse, scroll down to the Occasion section. There, you will find many useful tips to improve the performance of your page. As you can see, one thing that Lighthouse recommends is to serve images in next-generation formats:
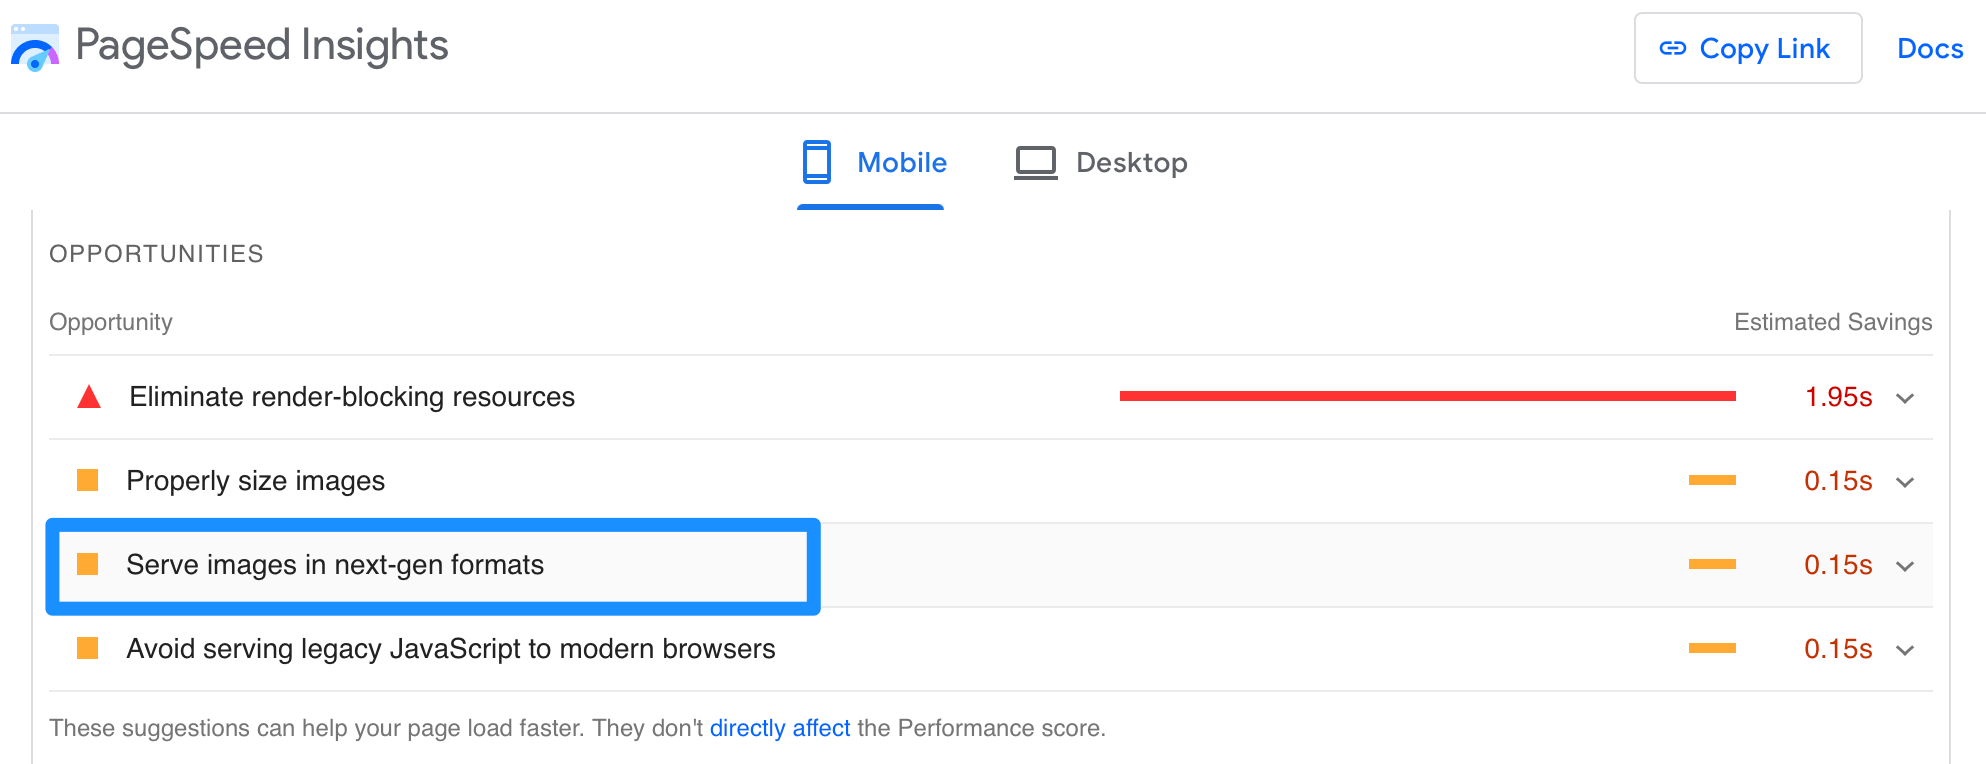
If you click on the suggestion, you can get more details about the topic. For example, Lighthouse will inform you that WebP and AVIF often provide better compression than JPEG and PNG.
As a result, these file types provide faster downloads and less data consumption. We’ll learn more about the benefits of next-generation formats in the next section.
Introduction to next-generation formats
In the past, JPG and PNG have been the traditional file formats for images. However, Google introduced us to WebP in 2010, while AVIF was established in 2019. Together, these next-generation formats aim to maintain high-quality footage while using smaller file sizes.
For example, WebP files are up to 34% smaller than traditional JPEG formats, yet they enable you to display more pixels. On the other hand, AVIF uses lossy compression, removing unnecessary data from the image file.
Since next-generation image formats have smaller file sizes, they are a great way to provide faster loading times to your website. This is important because slow pages drive users away. Meanwhile, you can lower your bandwidth costs, because fewer server resources are needed to display each image.
On top of all that, next-generation images let you improve upon some core web vitals like Largest Contentful Paint (LCP). It helps you to enhance the User Experience (UX) of your site. Plus, since speed/user experience is a ranking factor for Google, it’s a great way to improve your search engine optimization (SEO) and drive more organic traffic.
It is important to note that while most popular browsers support WebP, AVIF is still not universally supported. However, it’s getting closer. As of the time of this writing, more than 80 percent of web users are using AVIF-compatible browsers. [2], including Chrome and Opera. This means that now is the perfect time to start using these image types on your website.
Also, if you use the solution from this post, the tool will automatically provide the optimal format based on each user’s browser, so you won’t have to worry about compatibility.
| webp browser support | avif browser support |
| 97.66% |
How to Serve Images in Next-Gen Formats on Your WordPress Site
In most cases, to start using WebP on your WordPress website, all you need to do is make sure you are using WordPress version 5.8 or above. If not, you can update your original software (which is a good idea for performance and security anyway). This will enable you to upload webp images normally.
However, if you are using an older version of WordPress and don’t want to upgrade, you can use a plugin to render images in next-generation formats. It is also the easiest way to enable the AVIF format on your website, as WordPress does not currently support this image type by default.
Step 1: Install and Activate the Optimol Plugin
There are lots of image optimization plugins to choose from. If you already have one installed on your site, it’s worth checking whether it already offers you the option to enable next-gen image formats.
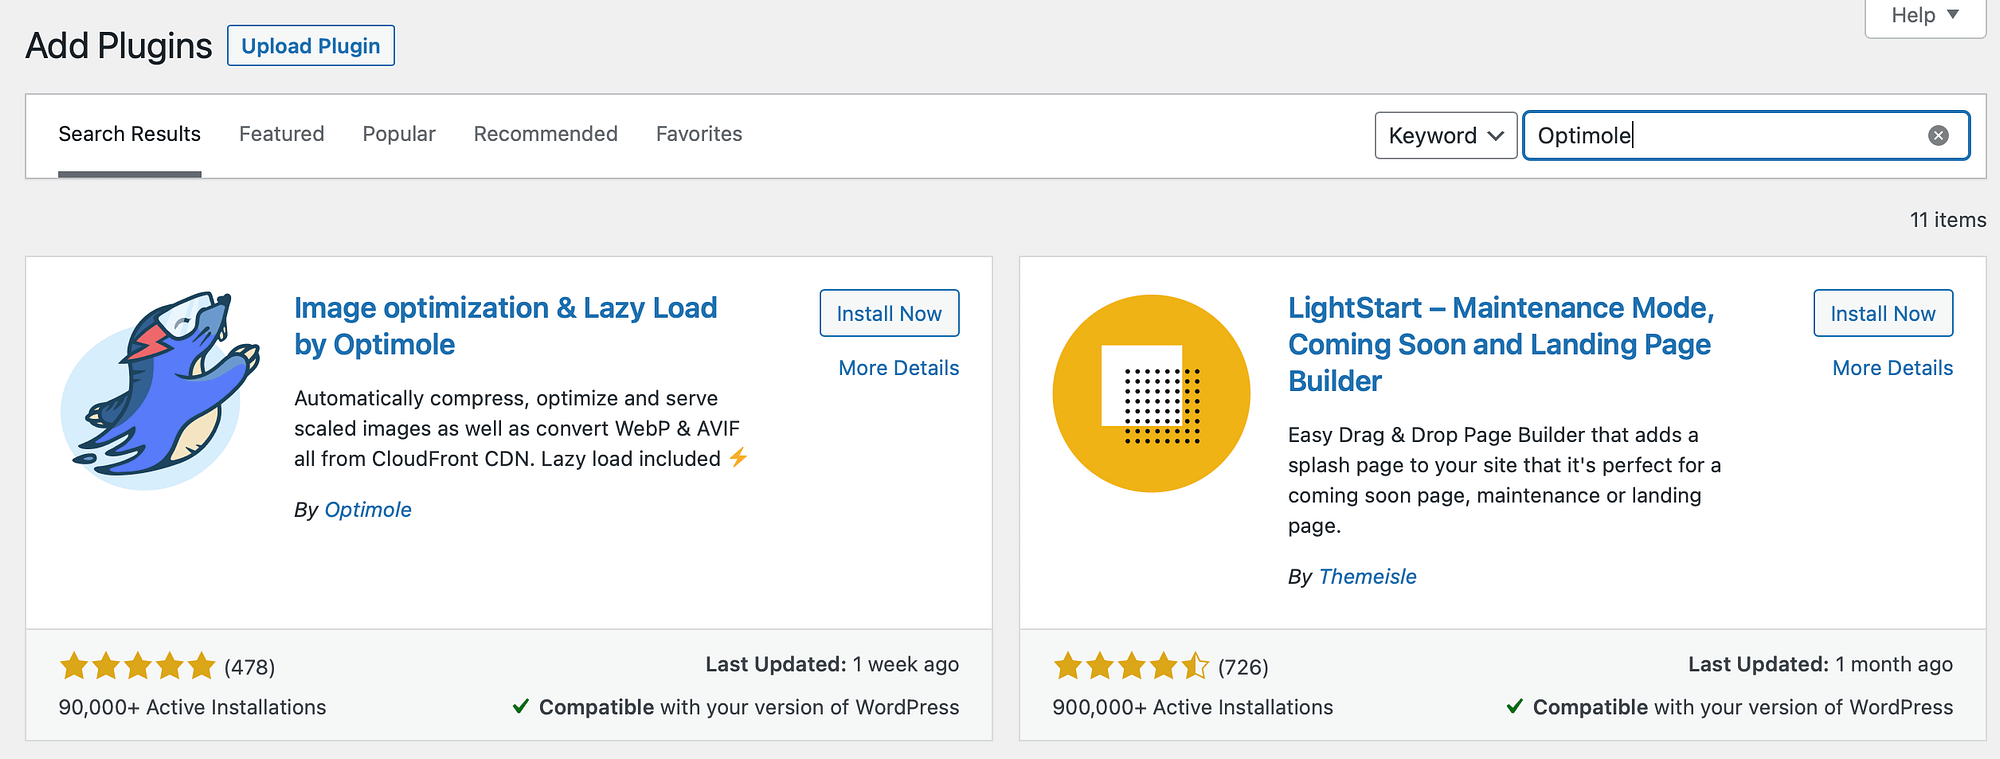
If not, Optimol is an excellent alternative. Not only does it let you serve images in next-generation formats, it automatically compresses, optimizes, and resizes your WordPress images:
Better yet, you can access lots of useful features (such as lazy load) to improve your content delivery times. Optimole also includes its own Content Delivery Network (CDN) to further increase your loading times. All this makes the tool a handy all-in-one package for getting the most out of your website images.
One of the best parts about Optimole is that it is a freemium tool, which means you can choose the version that best suits your needs. With the free plugin, you can provide images to up to 5,000 users per month. If you run a fairly small or personal website, this may be all you need.
On the other hand, if you run a high-traffic website, you can opt for a premium plan to accommodate more visitors and get expert support. these plans start $19.08 per month When billed annually.
To get started with the free plugin, all you need to do is plug in, and add new to your WordPress dashboard. Use the search bar to search for “Optimal”, then install and activate the plugin:
Once you activate the plugin, you will be asked to generate your free API key, which only takes a few seconds.
Step 2Enable the AVIF Conversion Feature
After activating the Optimol plugin, your site will automatically be able to serve images in webp format. In other words, simply installing the plugin is sufficient to enable the webp file type.
However, you’ll need to tweak the settings to enable the AVIF image type as well. Luckily, it’s very easy.
all you have to do is raise your head media in your WordPress dashboard. then select optimal, After opening the Optimol Dashboard, switch to Adjustment Tab:
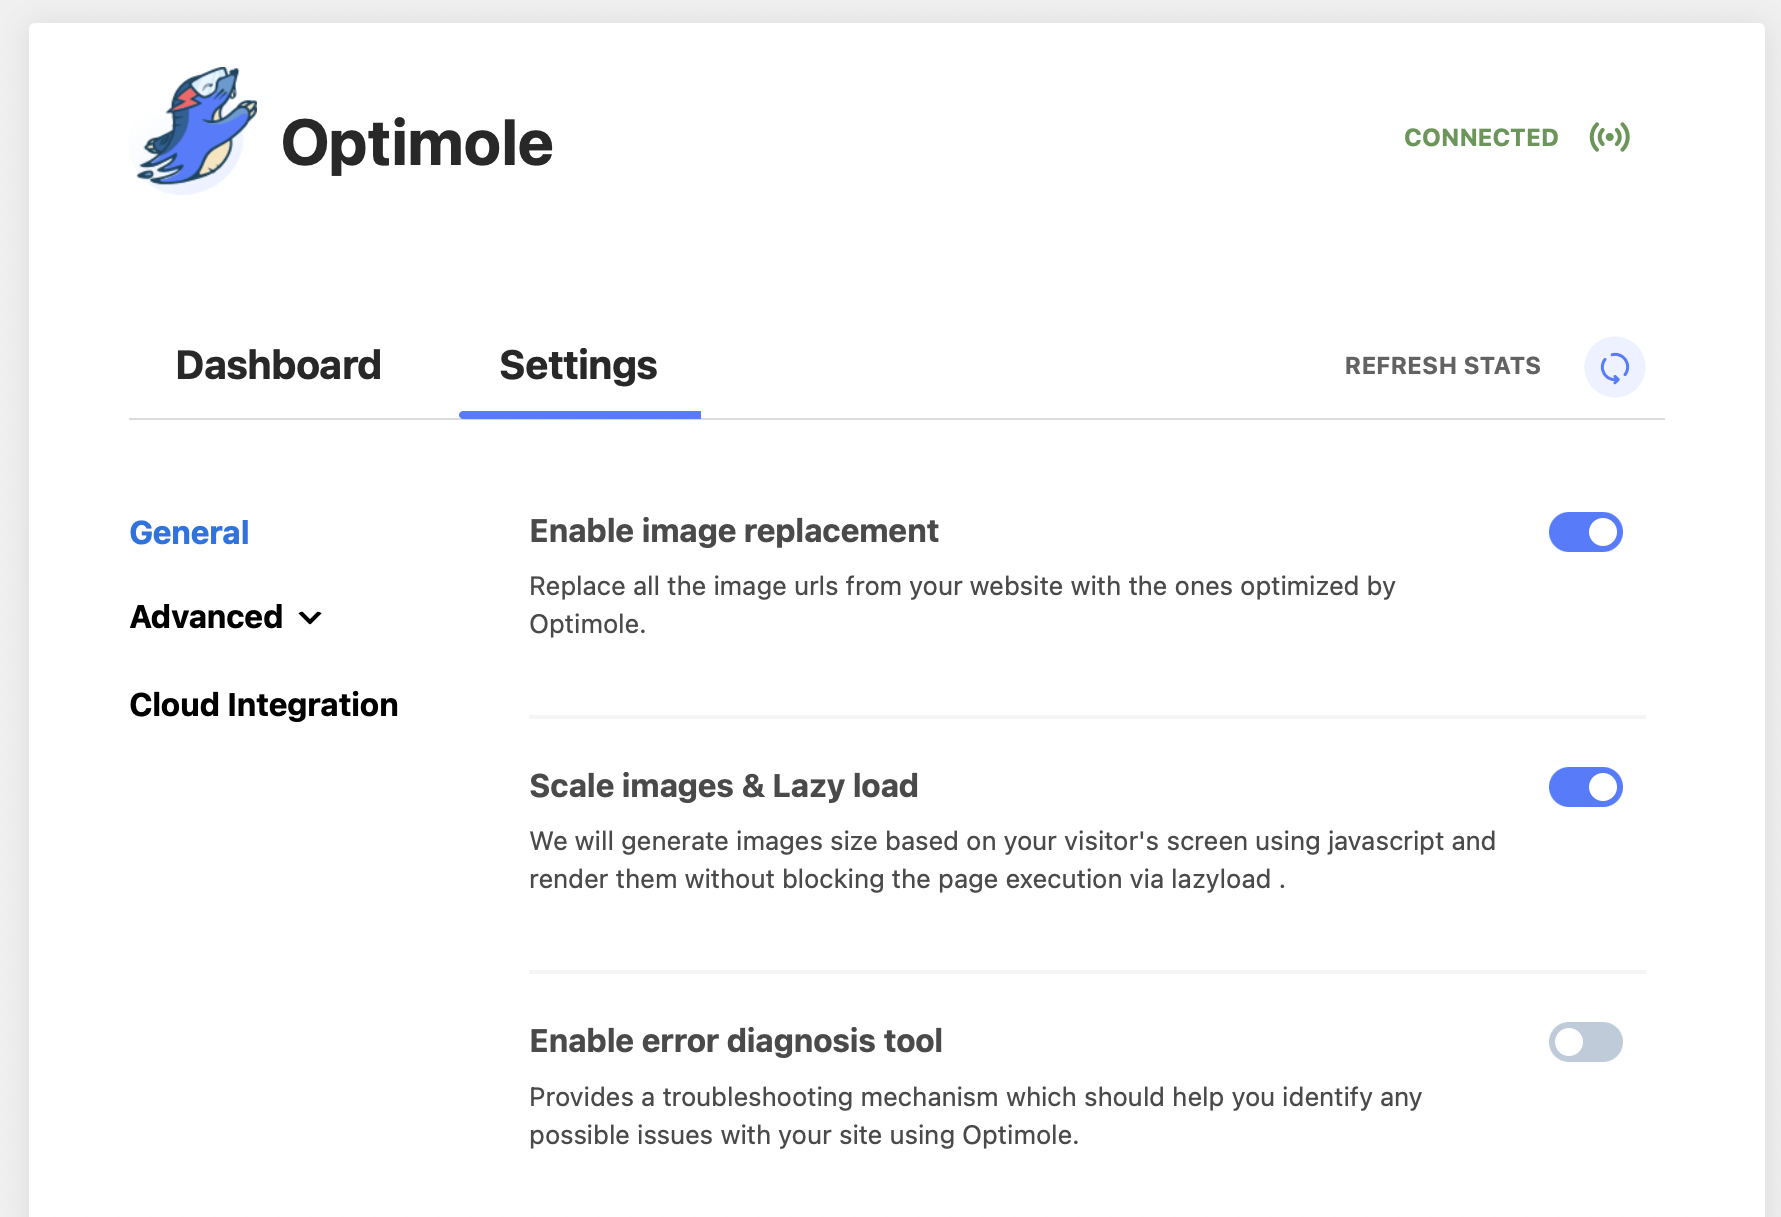
First, you will be presented with the general settings of the plugin. To enable AVIF conversion, select advanced From the left-hand menu, click on More Pressure,
You have a lot of options to explore here. For example, you can enable GIF to video conversion, or serve CSS and JavaScript through Optimole. we would recommend Browsing the Plugin’s Documentation To familiarize yourself with all the available options.
However, for now, search enables avif conversion Option:
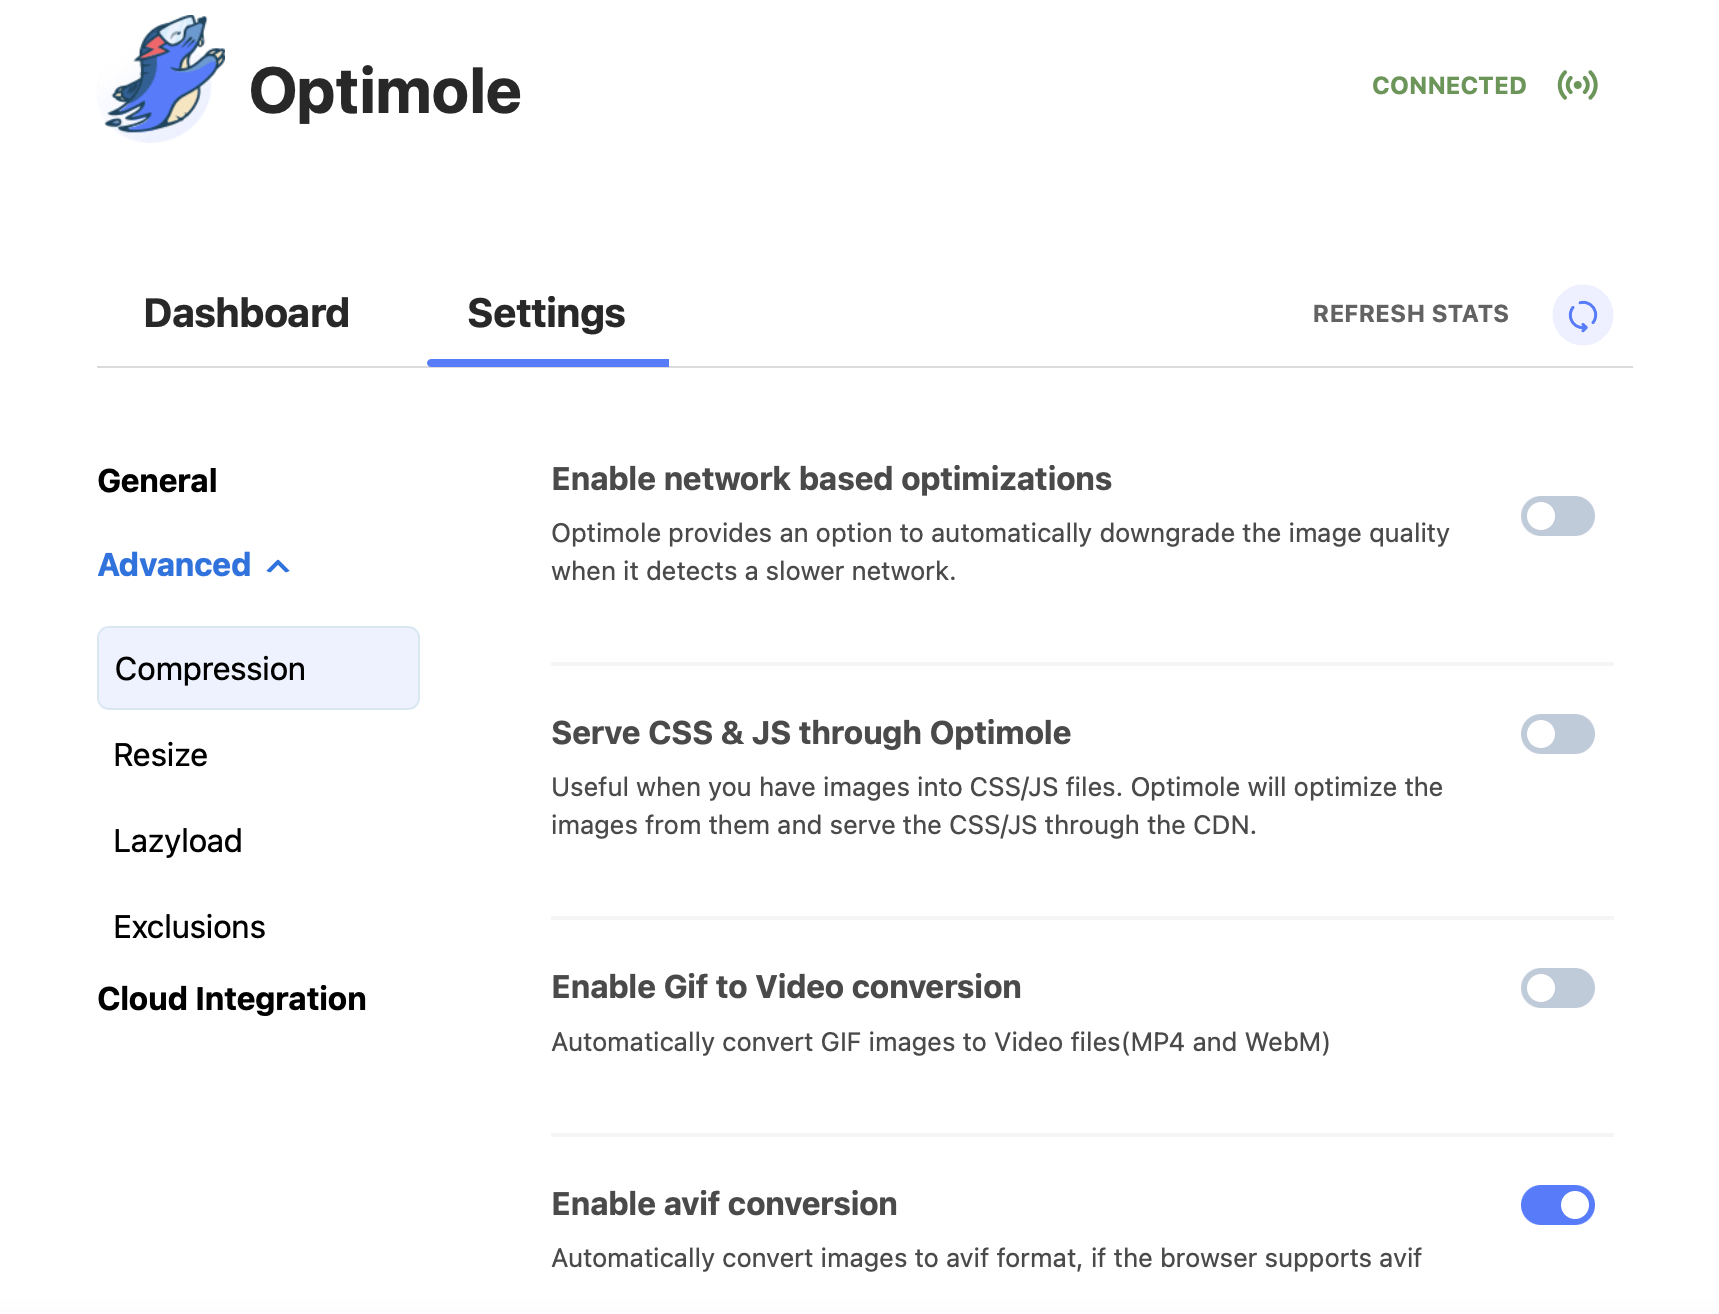
Simply toggle the setting on to serve your WordPress images in AVIF formats. That’s all you have to do!
It is important to note that this feature will only work with visitors whose browsers support the AVIF formats. However, the good news is that there is a downside in place. Visitors using browsers that do not support AVIF will be served images in the WebP format instead. So, almost everyone who visits your site can benefit from these next-generation formats.
Start serving images in next-generation formats
The WebP and AVIF image types are recommended by Lighthouse, as they enable you to provide high-quality images to visitors while maintaining small file sizes. This way, you can increase loading times and have a smooth UX.
In turn, this can help you improve your site’s performance on core web vitals and achieve better search rankings. Plus, your images will still look great!
As we have seen, it only takes two simple steps to render images in the next-gen format in WordPress:
- Install and Activate optimol plugin,
- Enable the AVIF Conversion feature.
For another way to improve your site’s performance in Lighthouse, you can check out our guide on reducing cumulative layout shifts.