There are lots of situations where downloading images from your WordPress media library makes sense. For example, you might be migrating to a new website, or you might want to back up valuable media files. Or, you may need to download just a few images to your local computer instead of downloading an entire media library.
The good news is that there are several ways to download your media library in WordPress. For example, you can use the WordPress export tool or install a plugin to automate the process. Alternatively, if you don’t want to use a plugin, you can download your images via File Transfer Protocol (FTP).
In this post, we will show you five ways to download images from the WordPress media library. let’s get started!
Five ways to download images from the WordPress media library
- Download one or more images from your WordPress dashboard – Download individual pictures as needed.
- Use the WordPress export tool – Bulk export all images uploaded between a certain start and end date.
- Install a plugin to download images – Export links to all your images or download a zip file of the actual image files.
- Download Your Media Library Files via FTP – Bulk download all image files to your local computer.
- Back up your site using a plugin like Duplicator – Download a copy of your entire site, including all of your site’s images.
1. Download one or more images from your WordPress dashboard
The rest of the methods in this list deal with how to download images in bulk from the WordPress media library. That is, downloading each image at once.
However, you may have situations where you only want to download a few images, so we’ll cover that first.
To get started, go to the media area in your WordPress dashboard.
Make sure you are using ListView. Then, hover over the image you want to download and click the download file Option.
This should automatically download the image file to your local computer.
To download additional images, you can repeat the steps. However, if you want to download every single image in your media library, you should use one of the other methods on this list.
2. Use the WordPress Export Tool
The simplest way to bulk download images from your WordPress media library is by using the native export tool. This method is beginner-friendly and doesn’t require any third-party plugins.
However, it’s important to know that you’ll only be able to download your media library as a single XML file, not as individual image files.
While XML files are compact and readable, they can also be more complicated to work with. On the other hand, these files are ideal if you plan to upload your media library to a new website.
To export your WordPress website, just go here tool, export In your dashboard:
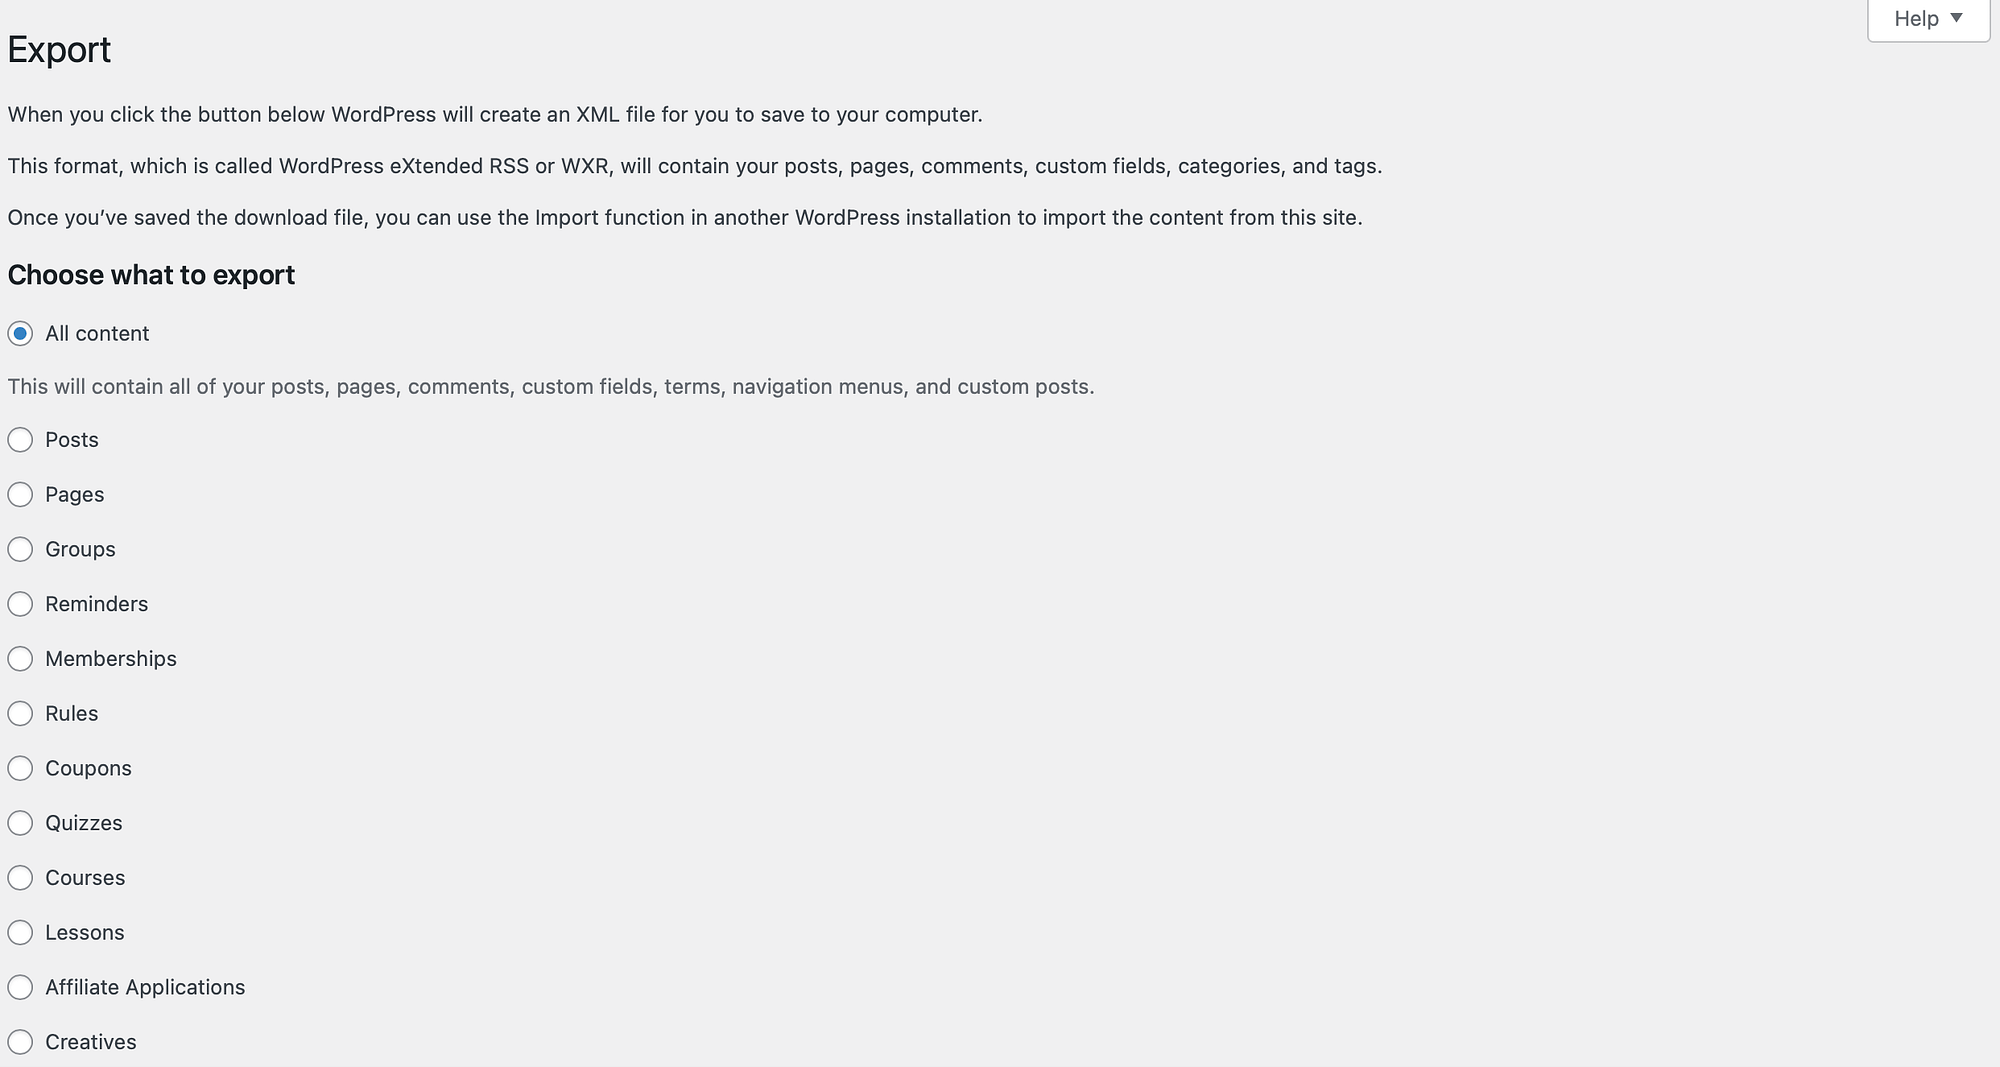
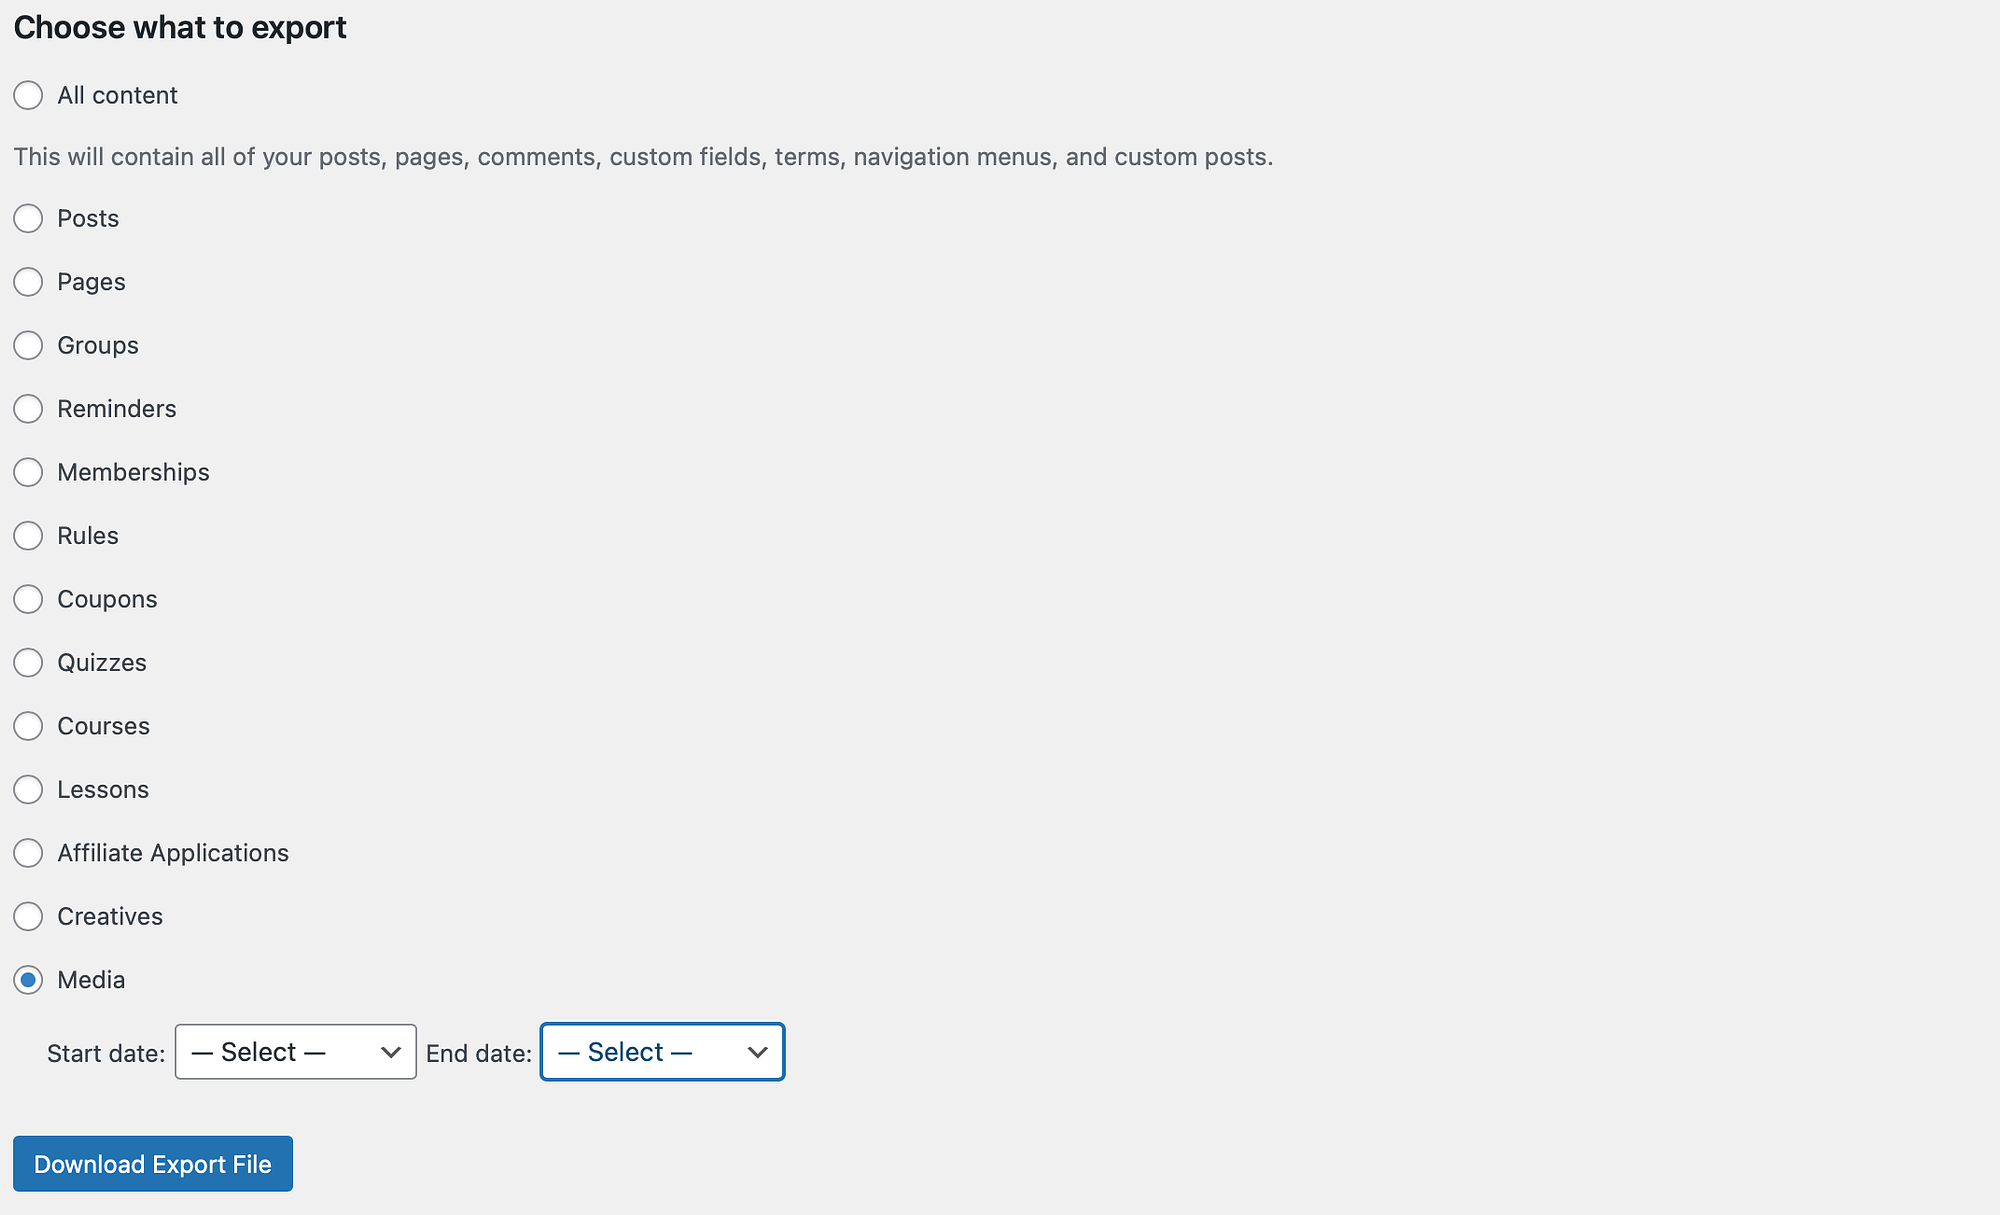
Next, make sure to select the circle next to media Option. At this point, you will be presented with a dropdown box where you can select a specific date range for the media you want to download.
For example, you might want to download only images that were added in the last month. If so, you can configure these settings here:
Once you have selected all the items you want to download, click on download export file,
Now, your WordPress media library will be saved on your computer as an XML file. Then, you can upload its images (and any other media you’ve saved) to another website using the native WordPress import tool.
3. Install a Plugin to Export Your Media Library
Another easy way to download images from the WordPress media library is by using a plugin to automate the process. One of the best tools for this task is the Export Media URL.
Not only does this plugin enable you to export media, but it also preserves the details associated with those files. For example, it will also export the ID, title, URL, and upload date information for each image or video. Plus, your download comes in a clean CSV file.
However, if you want to export the actual image files yourself, you might be happier with a plugin like Export Media Library.
We’ll show you how to use both plugins below…
How to use the Export Media URL plugin
To get started, you need to install and activate the plugin in WordPress. Upon activation, you will be redirected to the plugin’s settings page where you can configure the tool:

Here, you can choose the additional information you want to include in the export with the media file. For example, you can add Media ID, Media Type, Upload Date, and more.
Additionally, you can filter images by the author. stick with All Check the box next to each author or author whose media you want to export if you want to download every image in the media library.
Before you start exporting, you need to consider how you would like to receive the files. If you’re doing SEO analysis or security audit, you might want to see the URL in the dashboard.
Otherwise, check the box for CSV file, Then click on export now To download images from your WordPress media library.
How to use the Export Media Library plugin
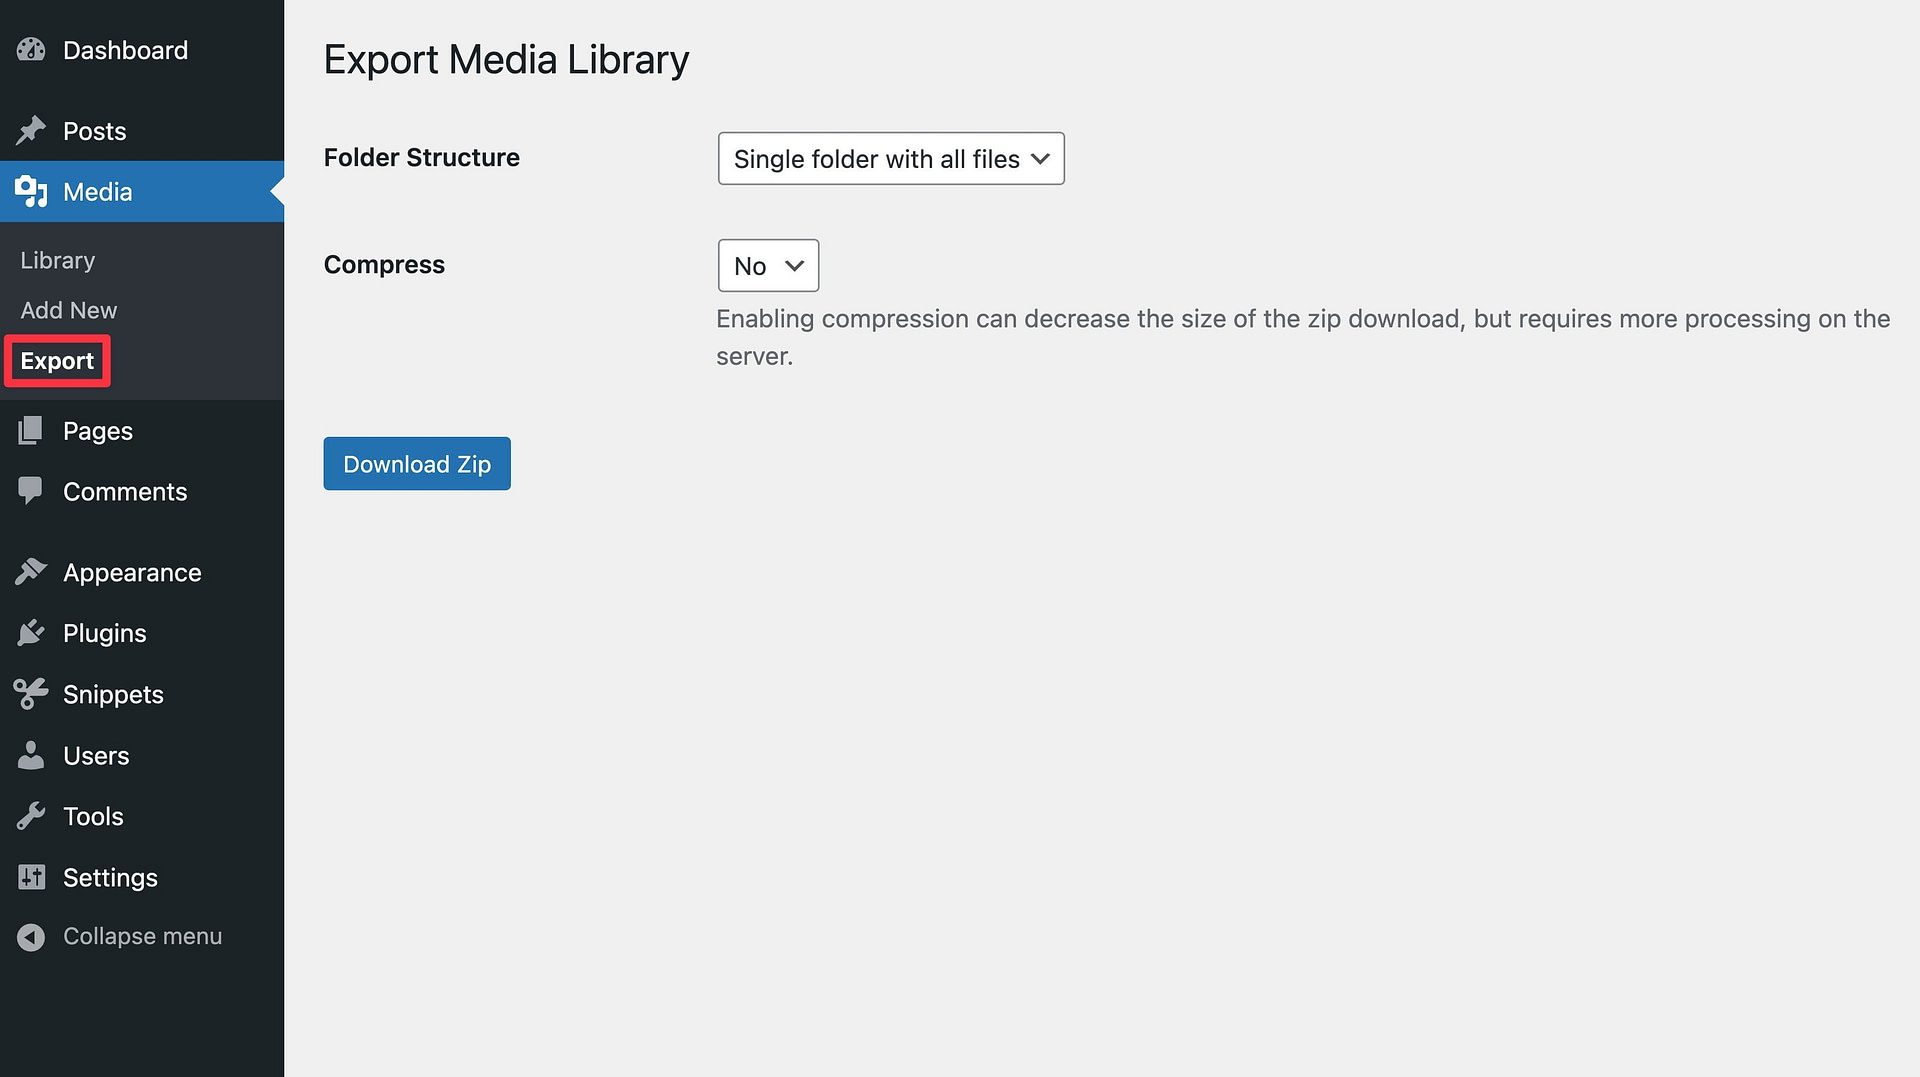
To get started, install and activate the free Export Media Library plugin from WordPress.org.
then go to media, export,
Choose whether you want to download a single file containing all your images or use nested folders to organize them by upload month.
You can also decide whether to enable compression or not.
Once you have made your choice, click the download zip Button to download a zip file of all the images in your media library.
4. Download Your Media Library via FTP
The most complete way to bulk download images from the WordPress media library is by exporting media files via File Transfer Protocol (FTP), which gives you direct access to all the files on your site’s server, including the media library.
We’ll show you how to do this below – but you can check out our full WordPress FTP tutorial if you want more in-depth instructions.
First, install an FTP client like free FileZilla software.
Then, you’ll need to connect to your site’s server. To do this, you will use your FTP credentials, which include your host, User name, password, and port,
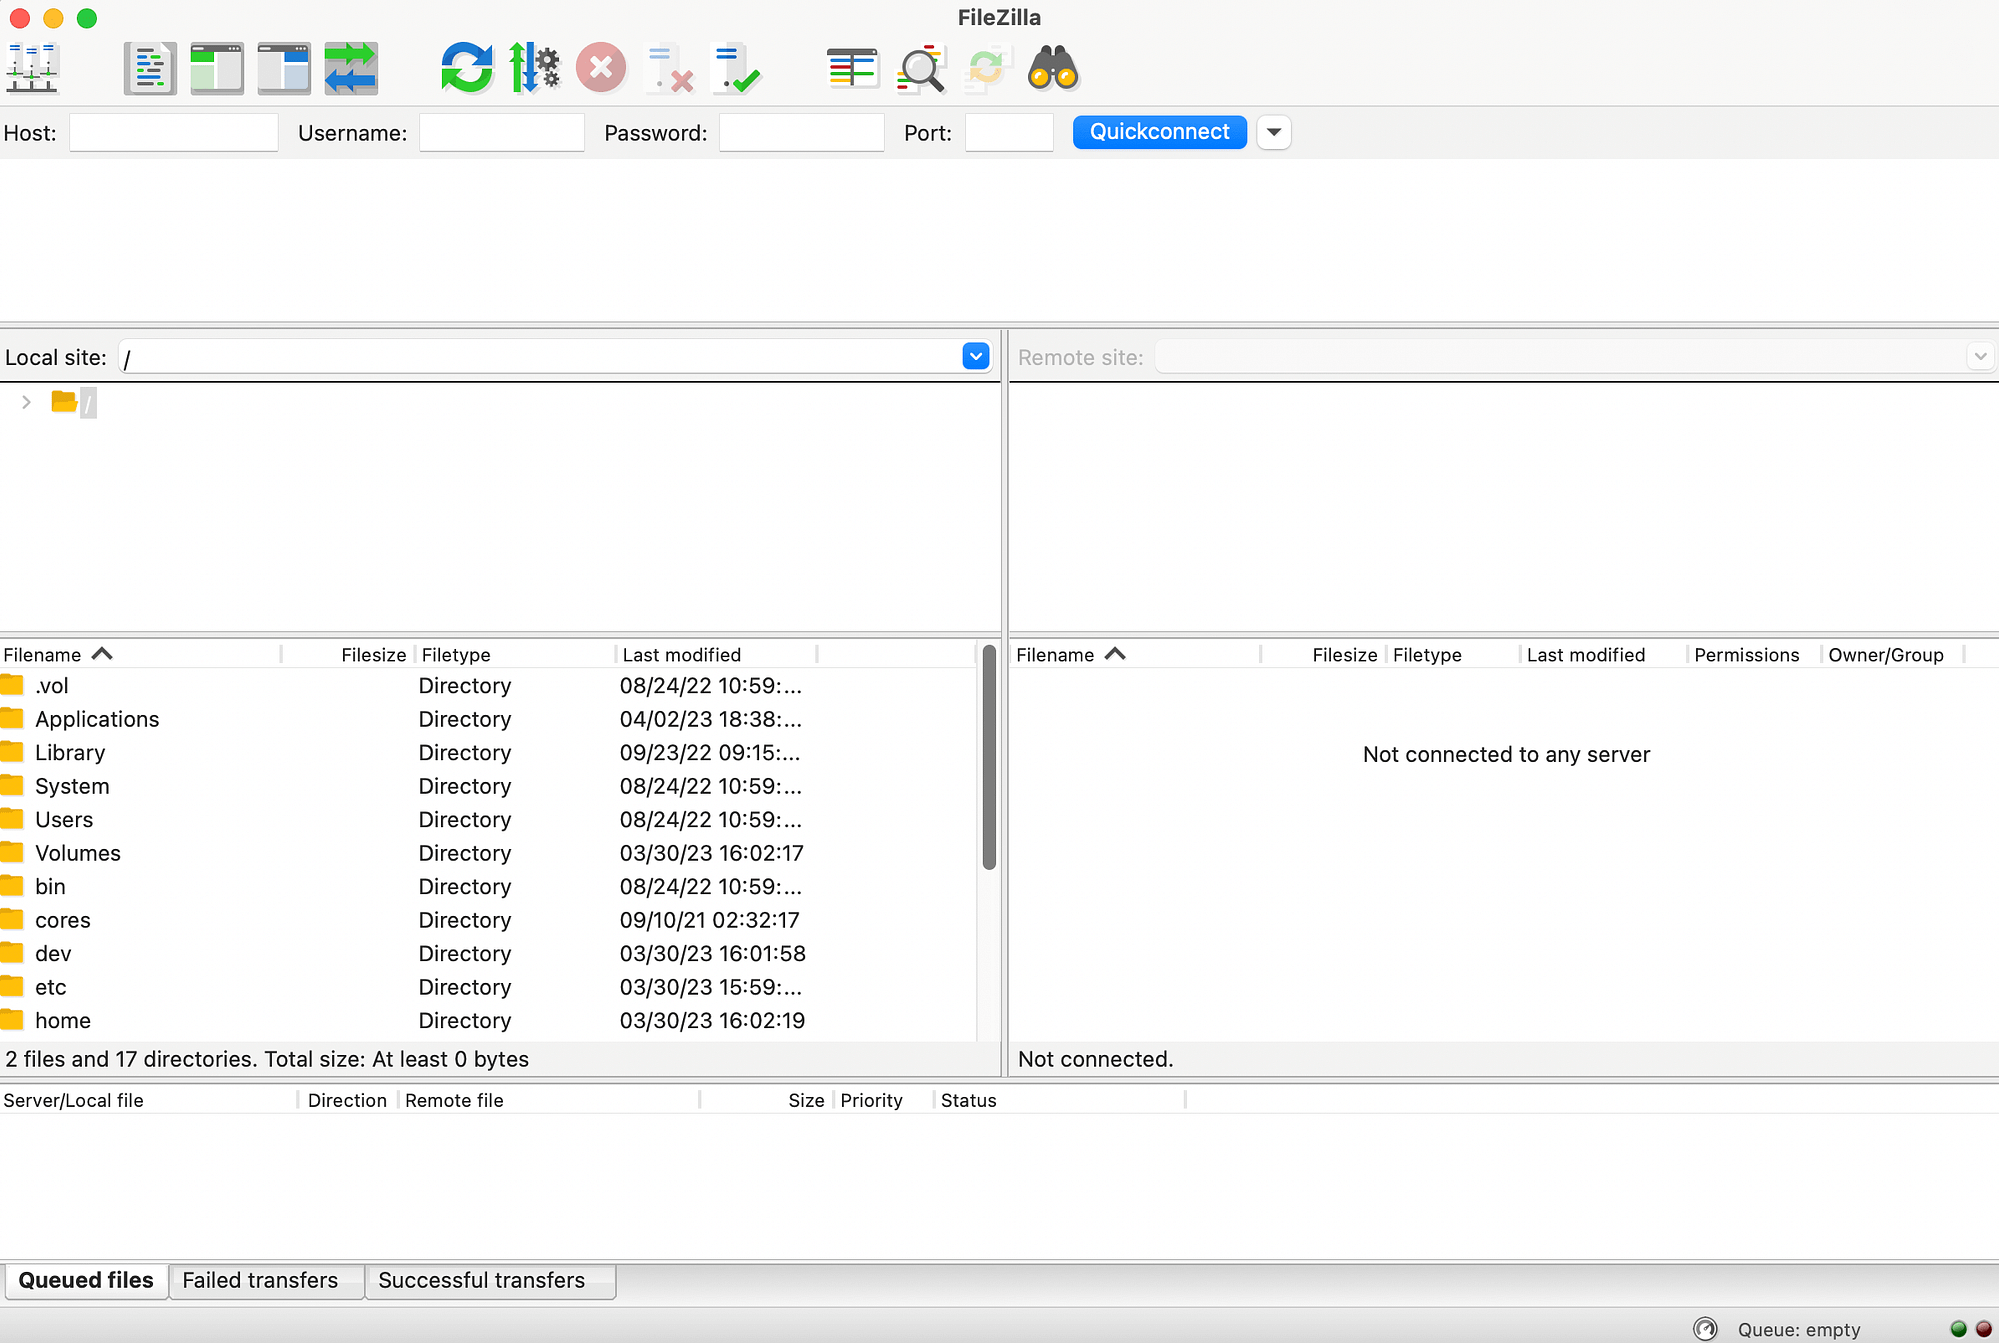
You can access this information by logging into your hosting account’s control panel. Or, if you are unable to access these details, contact your web host for assistance.
After you’ve connected your site, you’ll be able to see your site’s files in your right-hand pane, under the remote site section. Next, you need to locate the root directory of your site. it is usually labeled public_html or something like this:
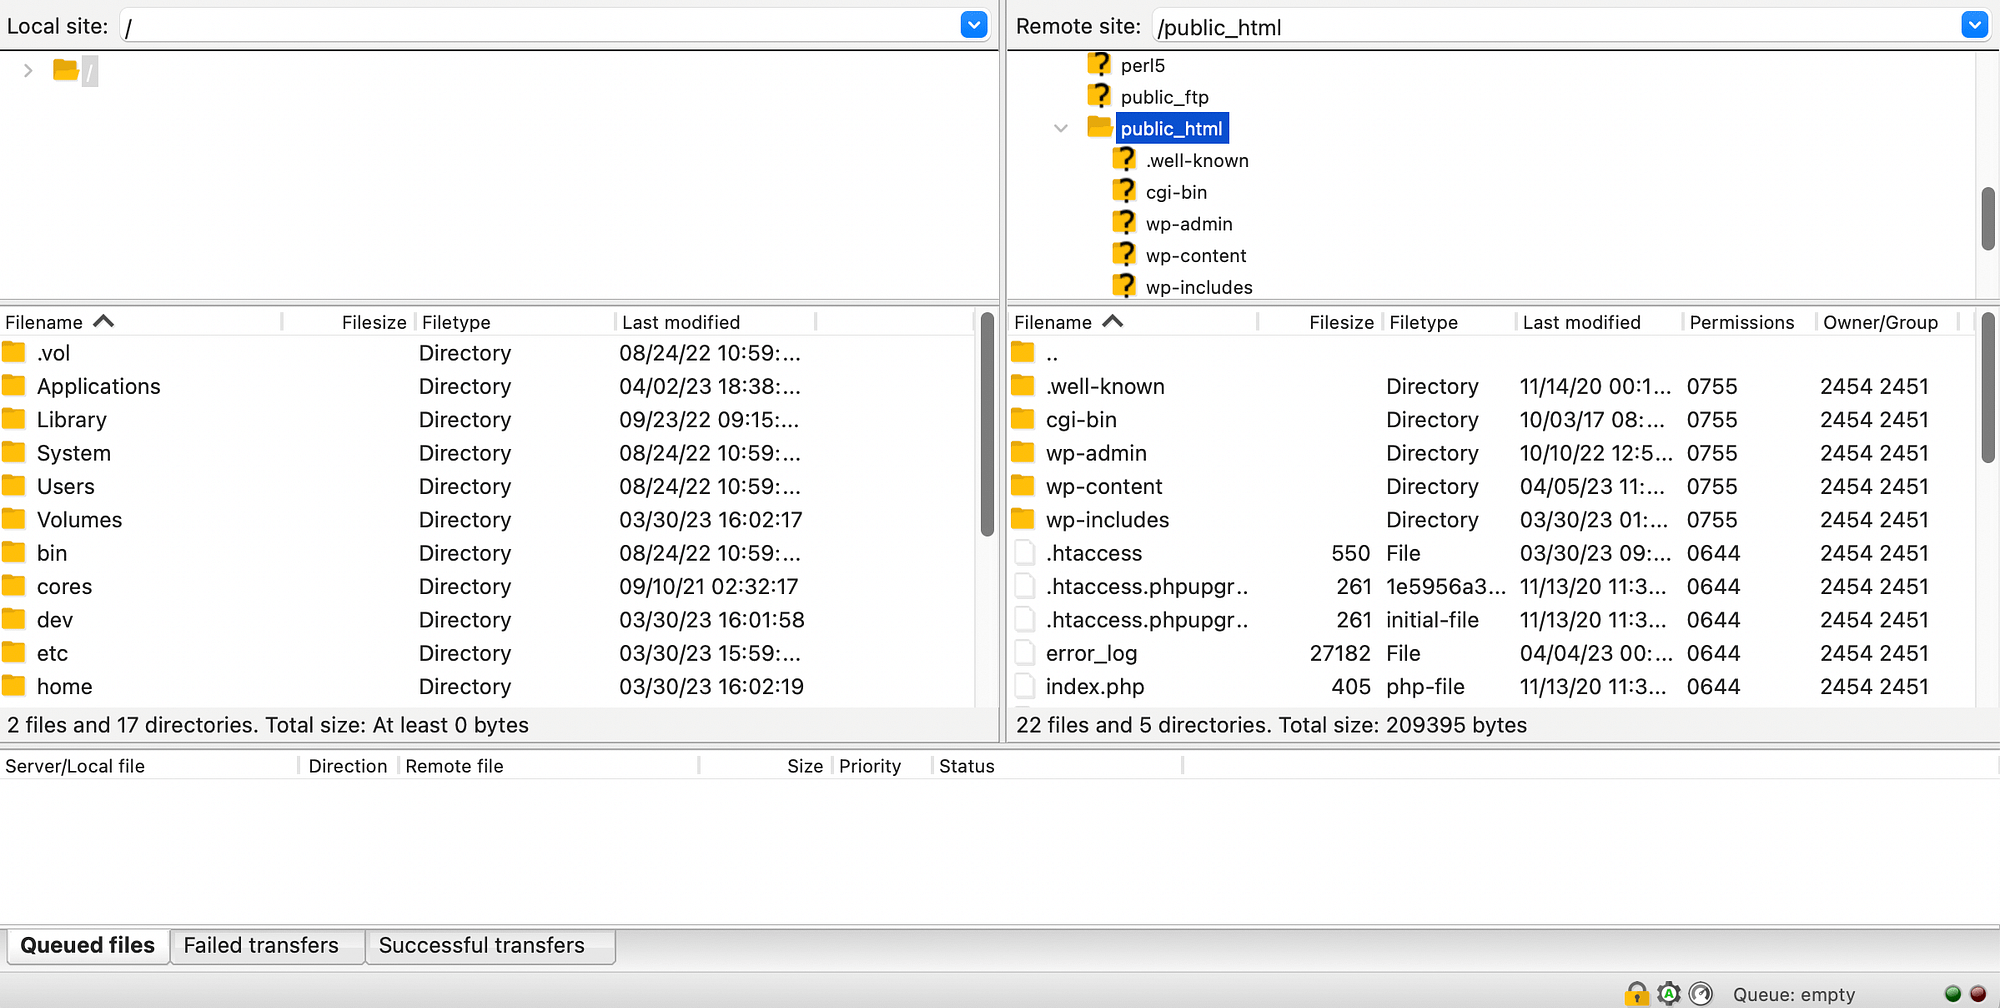
In your root directory, you will find the wp-content folder. open it and select Upload,
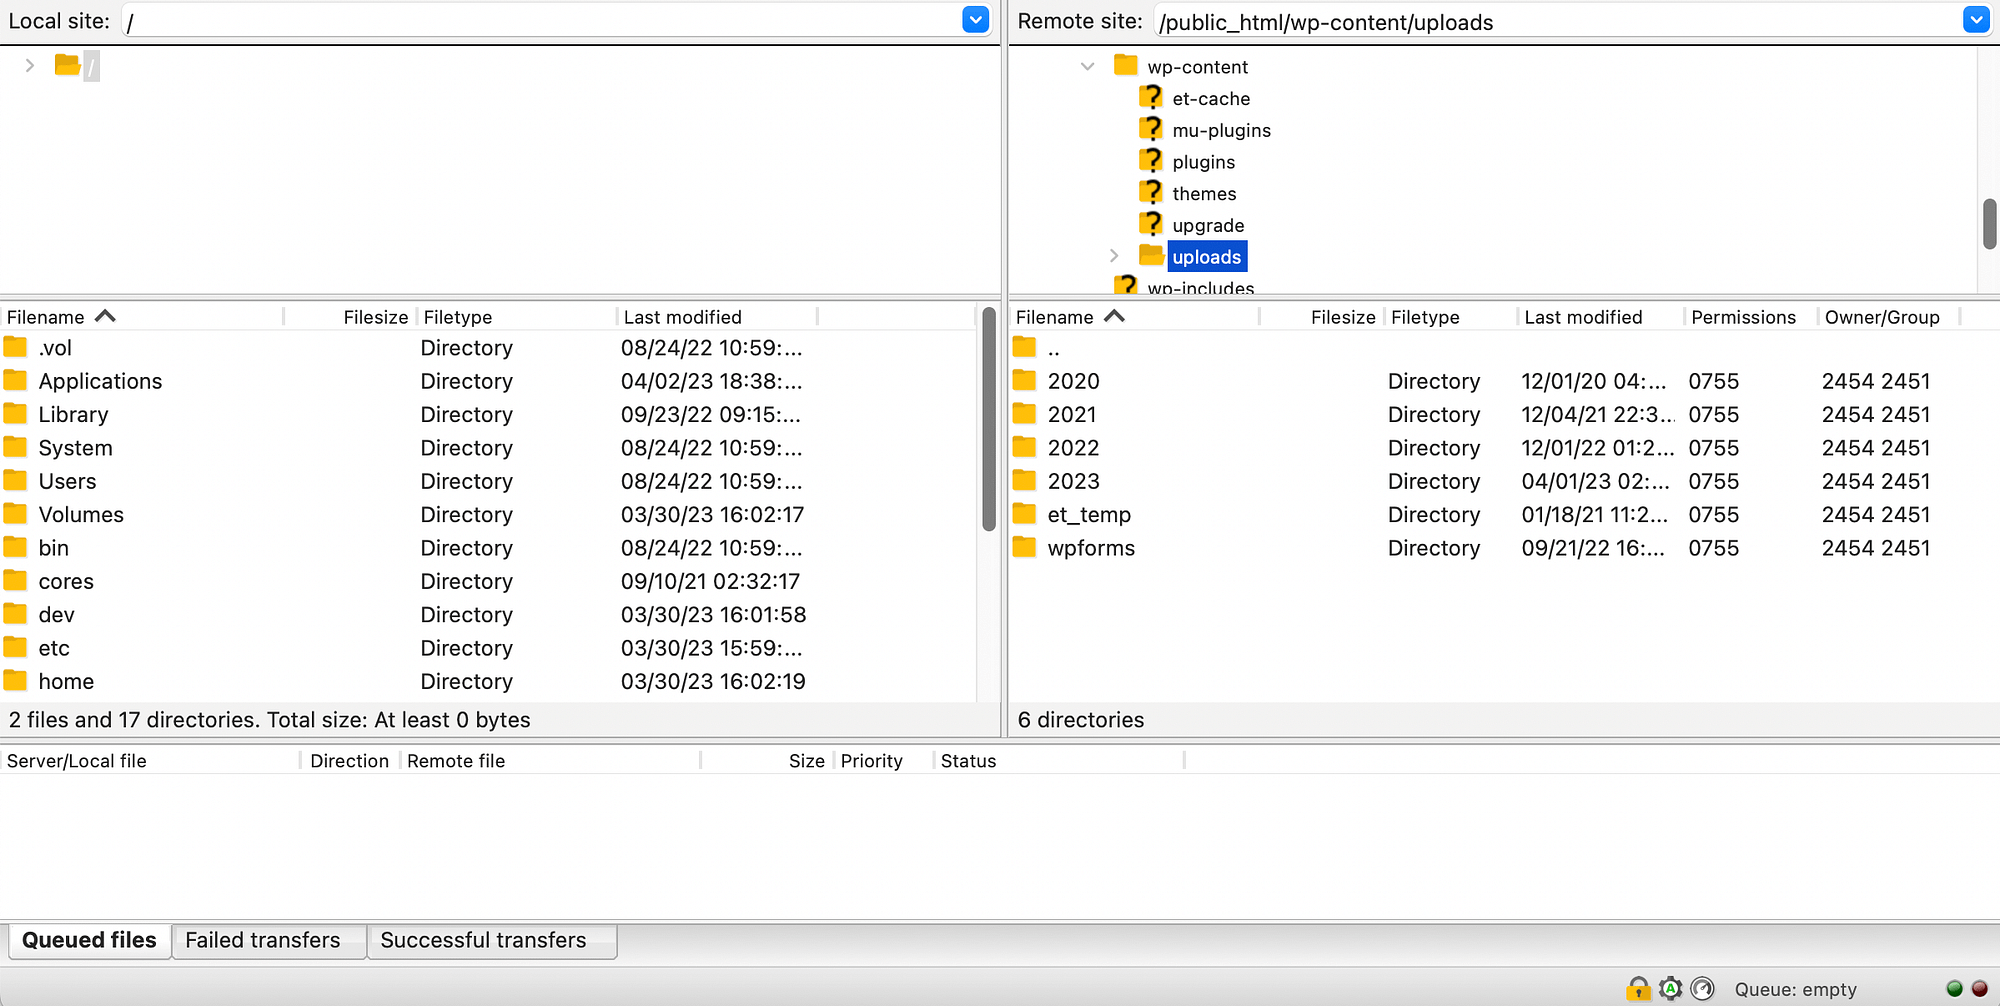
Now, all you have to do is drag the upload folder in your left-hand panel to save it on your local device. It’s as simple as that!
However, it’s important to note that downloading your media library this way can take time. This is because with FTP, each file will be downloaded individually. So, if you have a lot of images on your site, you may prefer to use a different method.
5. Back up your entire WordPress website
The final way to download your media library is to back up your entire website. Typically, users create website backups for security purposes. This is because if you are making any major changes to your site, it is helpful to have a backup in case anything goes wrong.
However, you can also create a backup of your website to export your images. To get started, you need to choose a backup plugin. There are lots of great options available, but Duplicator is extremely simple to set up and configure.
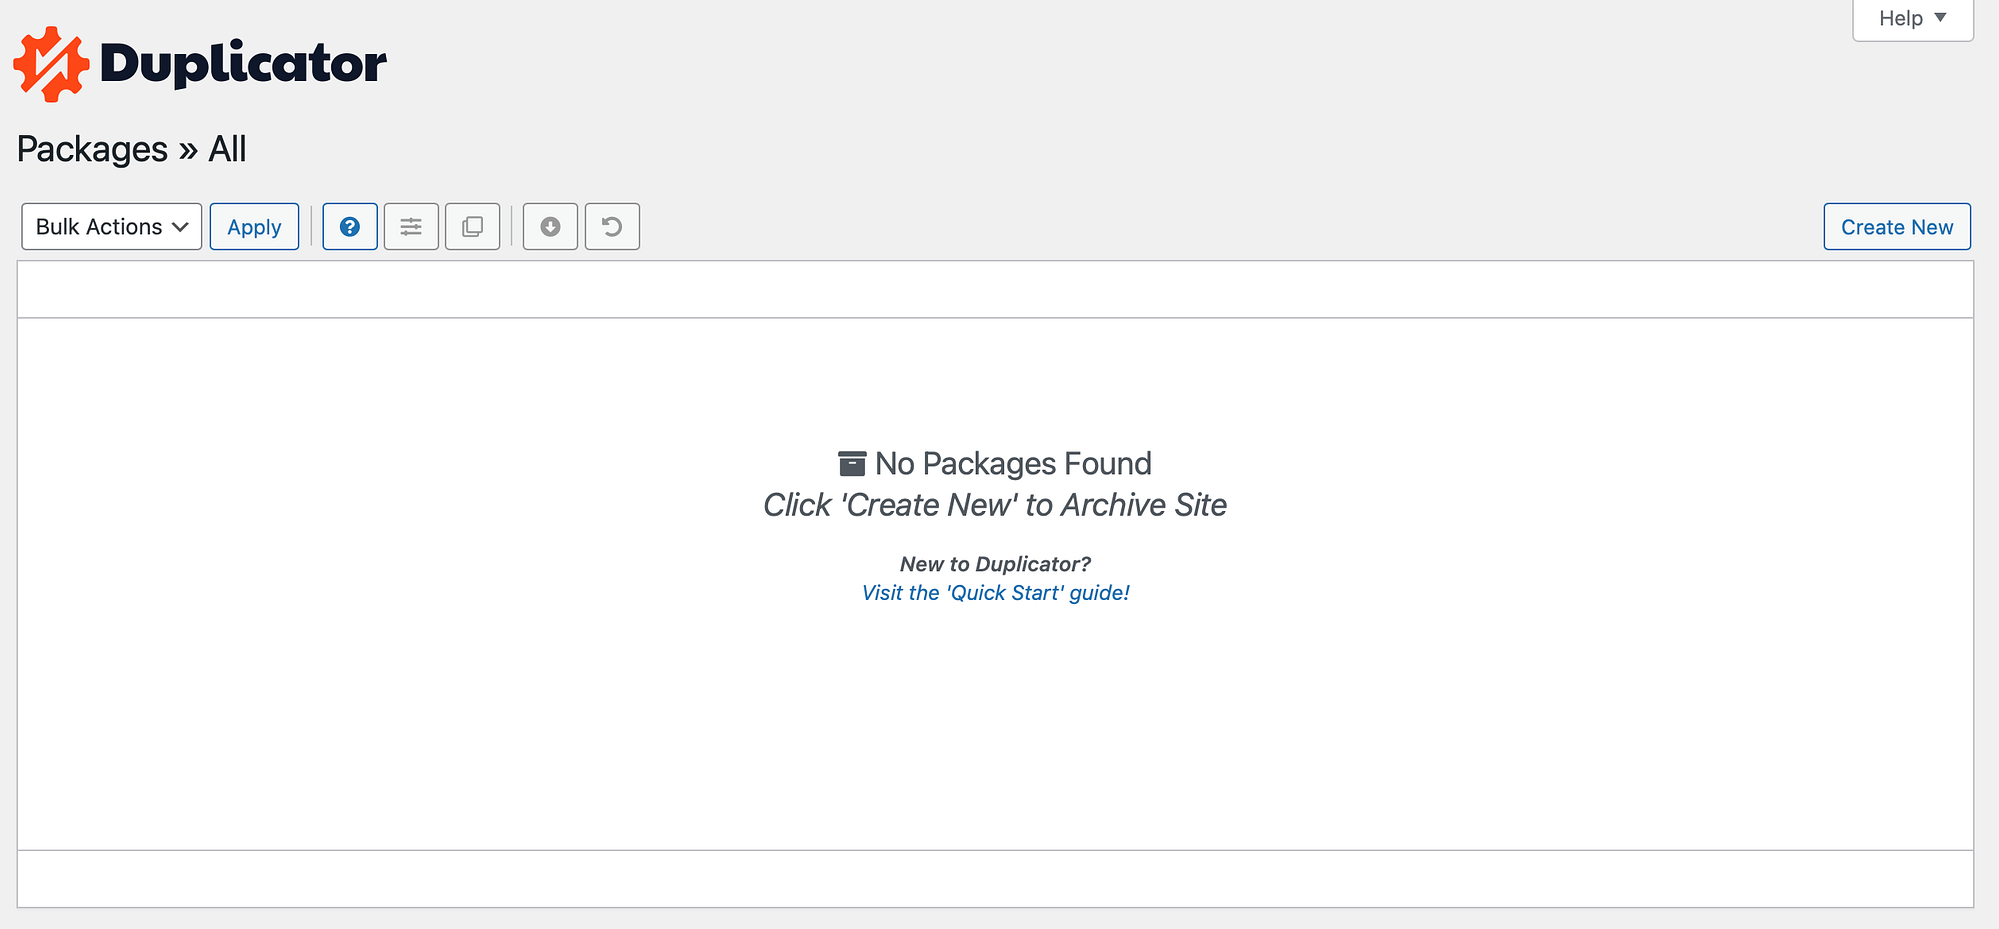
Once you have installed and activated the plugin in WordPress, go to duplicator, packages,
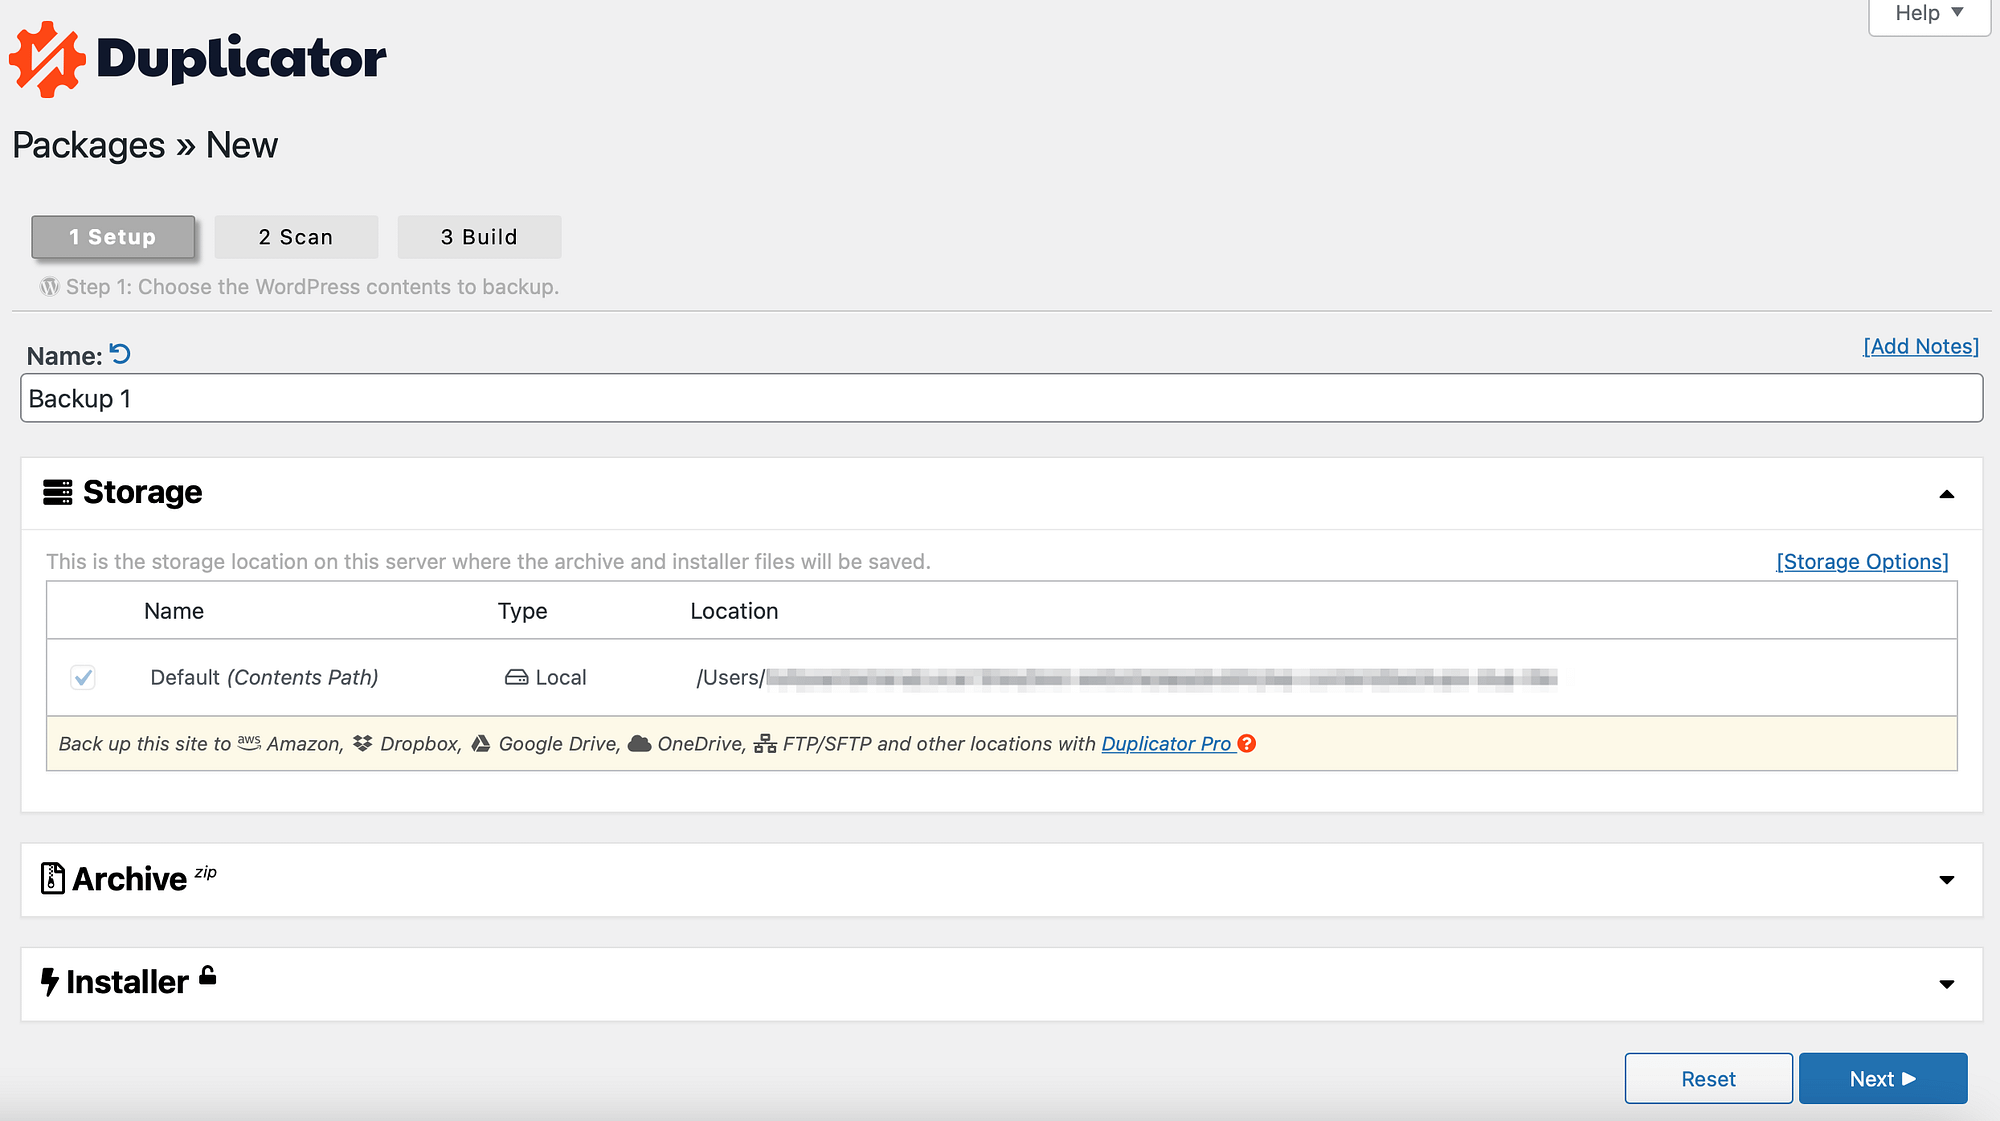
and click here New Construction in the right-hand corner. Then, pick and choose a name for your backup next To continue:
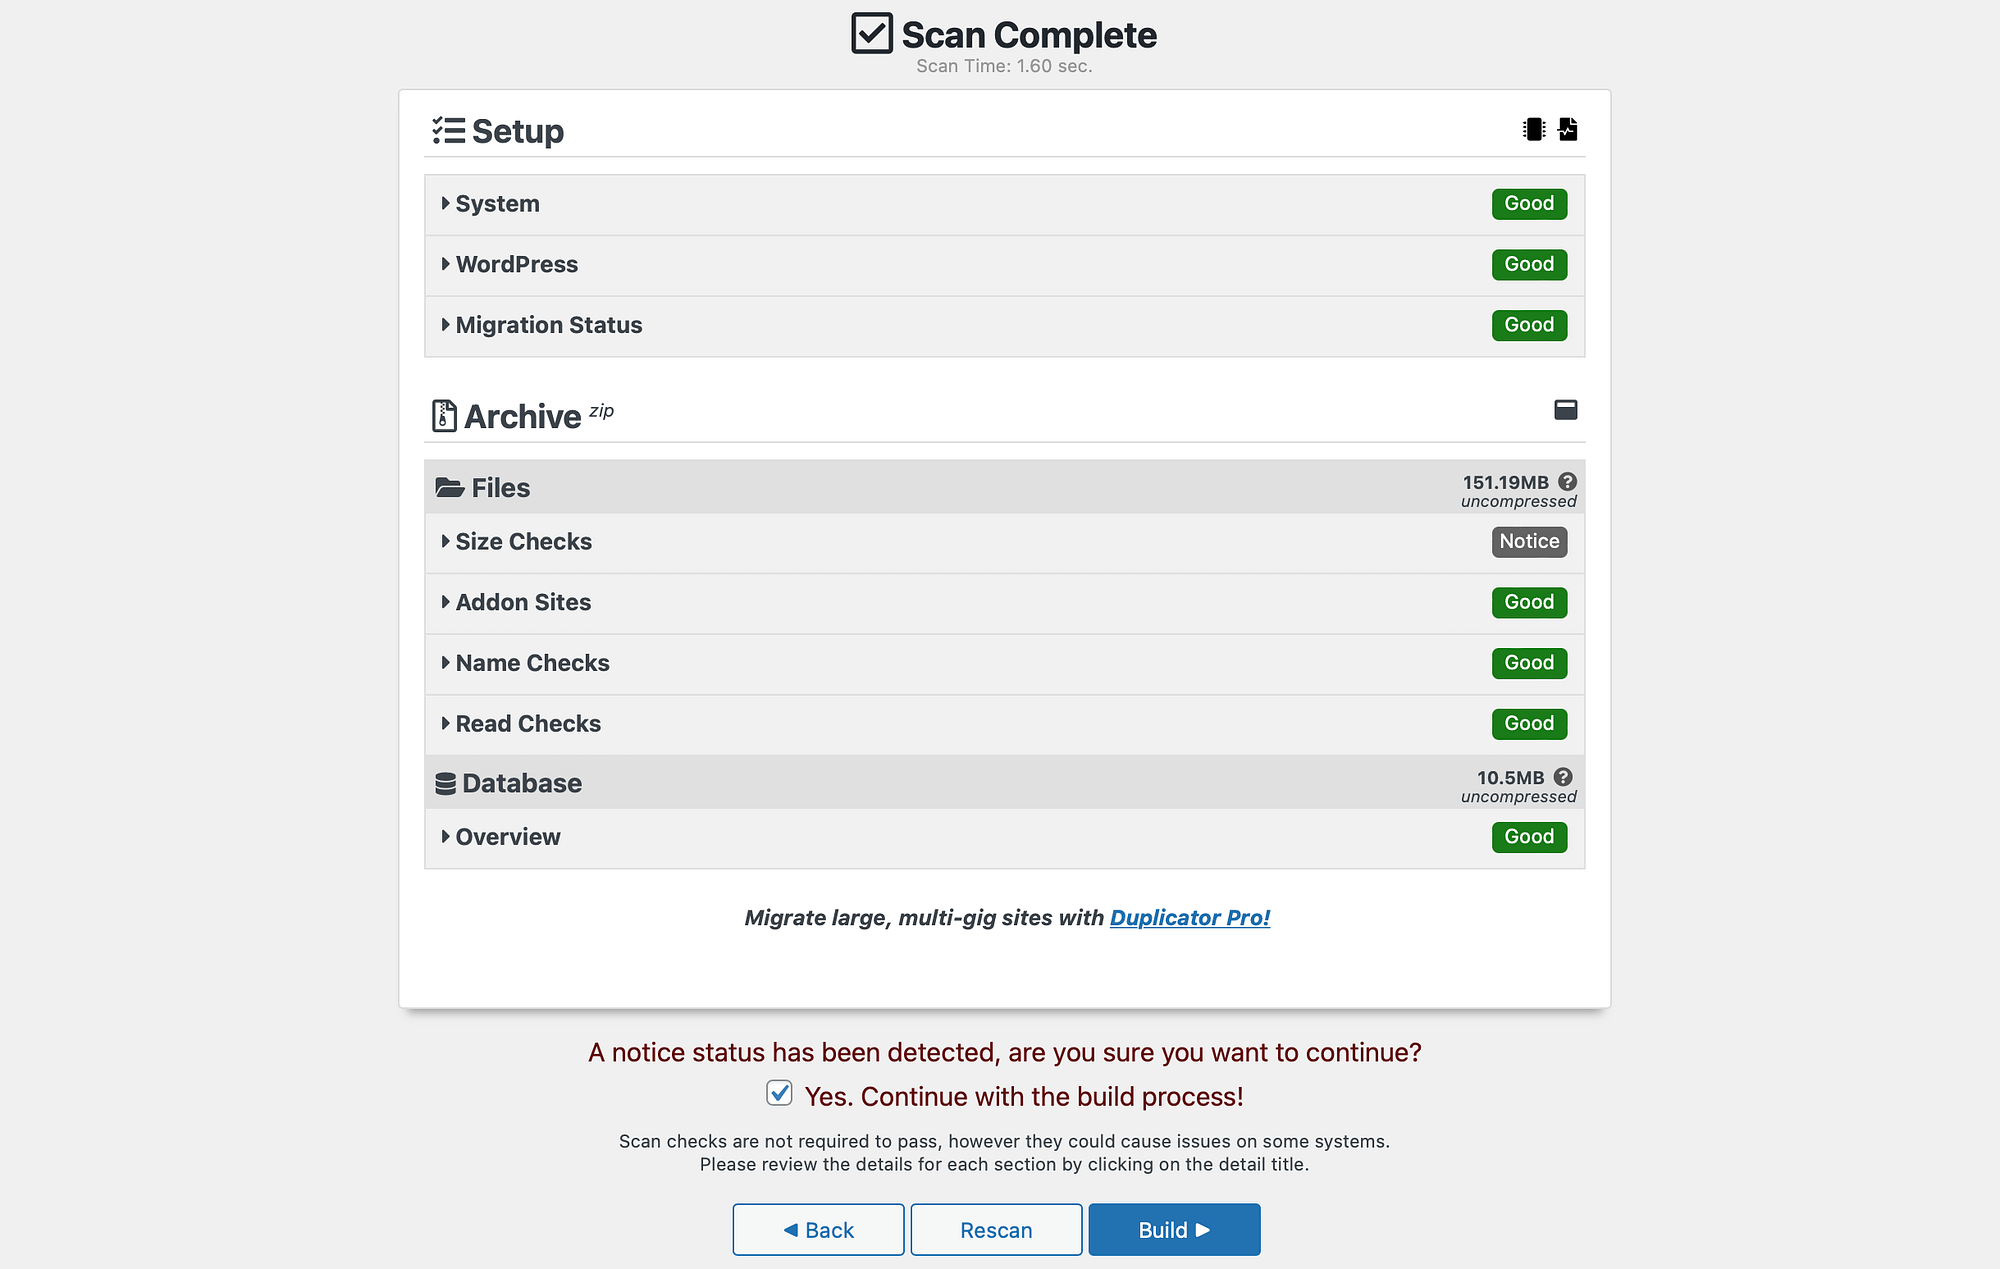
Your website will then be scanned, and you’ll be given information about your site’s migration status, file size, database, and more. If an error is found, you may want to fix the problem before continuing.
For example, you may find that you have too many uncompressed images on your site that can disrupt the backup process. In this scenario, it might be a good idea to optimize your images for better results.
However, if you are happy to proceed, simply check the box next to Yes. Continue the build process! Then, hit the Construction button:
At this point, click download both files To download your installer and archive files:
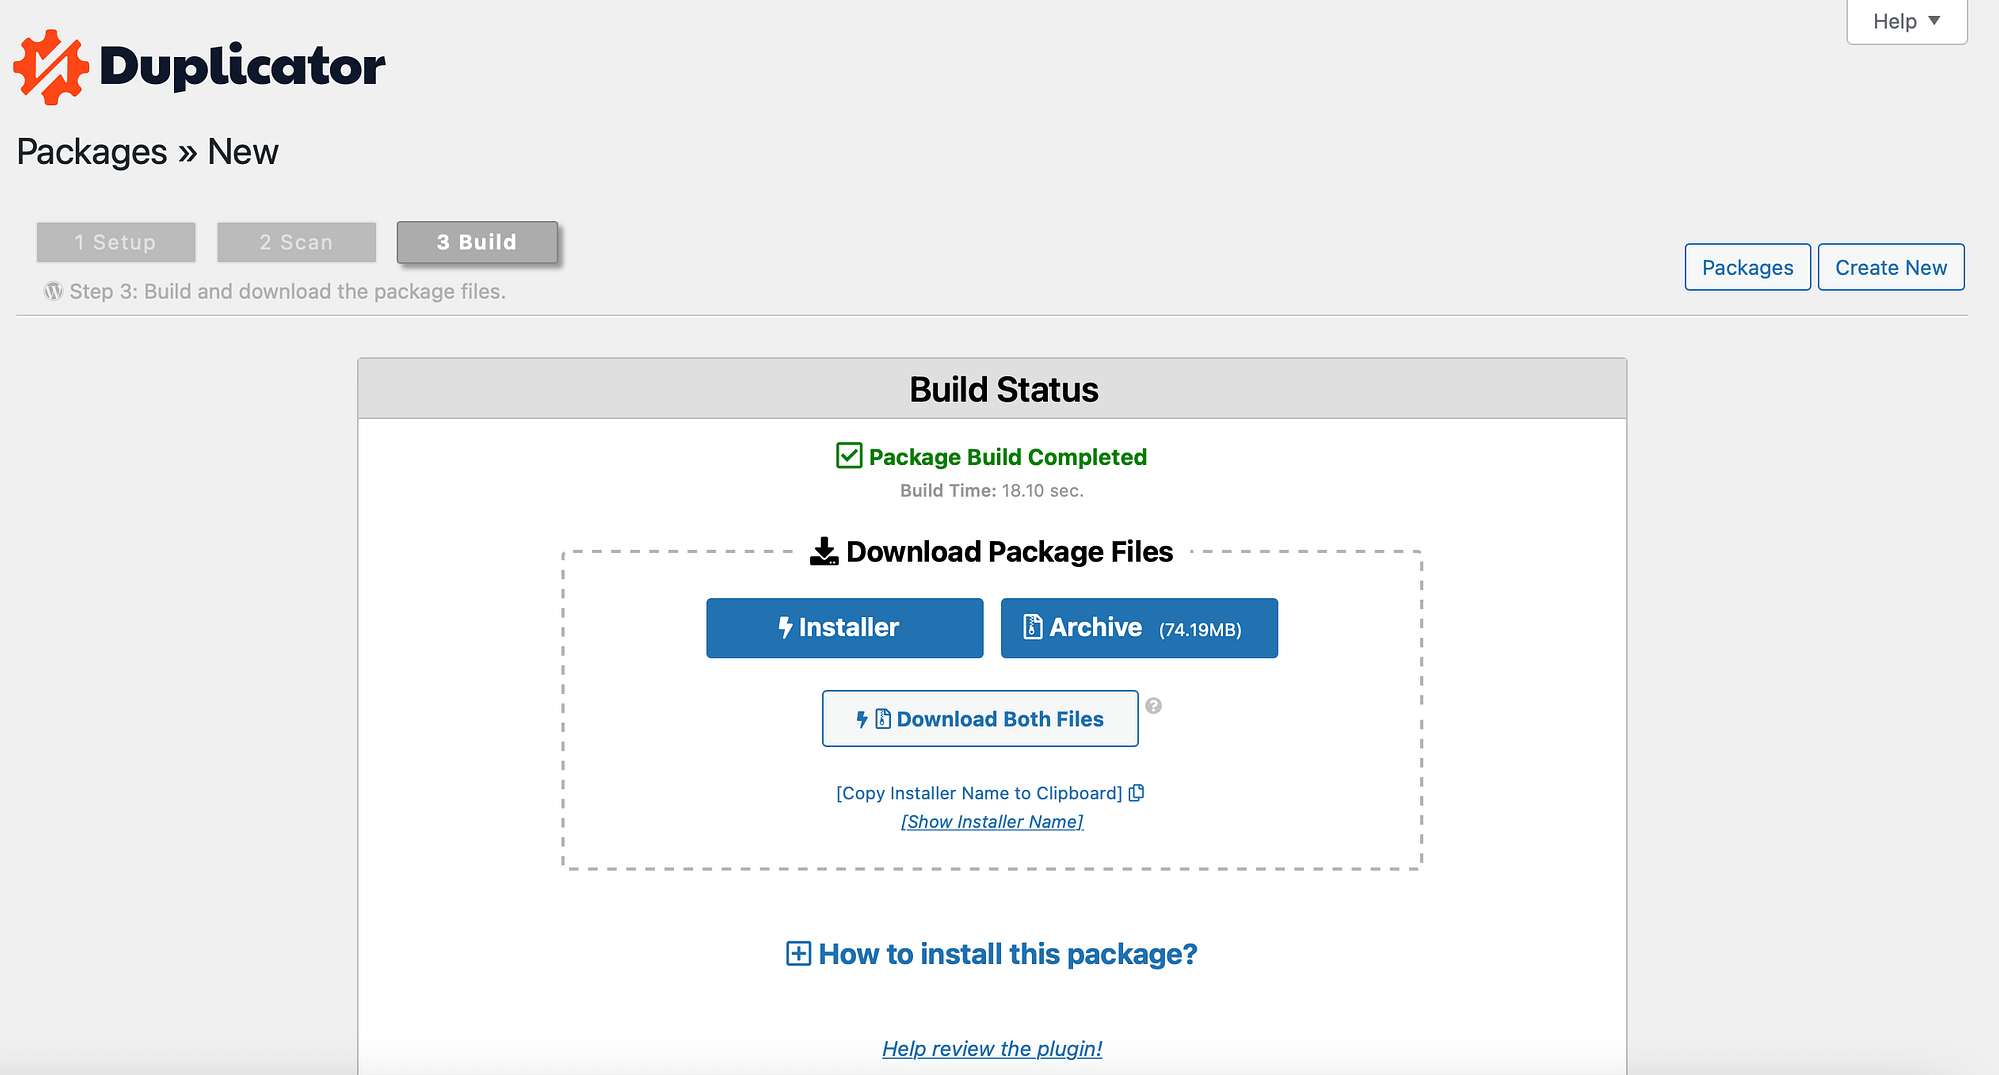
Now, your WordPress backup (including your media library) will be downloaded to your computer.
Conclusion
If you are visiting a new website or backing up your images, you may want to download your WordPress media library. This way, you can store the files on your computer or import them into a fresh WordPress installation. Fortunately, there are many ways to achieve this.
In short, here are five ways to download images from your WordPress media library:
- Download individual images from your WordPress dashboard.
- Use the WordPress Export Tool.
- Install plugins like Export Media URL Or export media library,
- Export your media library via FTP.
- Create a backup of your entire WordPress website.
Alternatively, you can also consider hosting your WordPress images externally, allowing you to store them on a separate server.