Wondering how to remove the “The link you followed has expired” error from your WordPress website?
This is a common WordPress error and anyone who manages a WordPress site may encounter it at times.
The error usually shows up when you’re trying to upload a plugin or theme, though you can see it in other places as well.
What Causes the “The Link You Followed Has Expired” Error?
The “The link you followed has expired” error usually appears when you are trying to upload a plugin or theme.
Your web host will have a set maximum file upload size limit.
When the file size of a theme or plugin’s Default upload and execution limit is exceeded you may face a link expired error.
Default limits are enforced by your hosting provider as a way to avoid misuse of server resources by disabled plugins and themes. That said, hosting providers usually ensure that the default limits are sufficient for uploading and executing plugins and themes.
Important: On rare occasions, you may encounter a “The link you followed has expired” error when updating a plugin. This is usually due to plugin conflicts, that is, two or more plugins installed on your website are interfering with each other’s functionalities, causing crashes and errors. We have a separate guide on how to resolve plugin conflicts. Follow the steps listed there.
How to fix “The link you followed has expired” error in WordPress
To fix the “The link you followed has expired” error, you need to increase the upload limit on your server.
But before you increase the limit, you might want to find out your host’s current limit first so you know where you are at the moment.
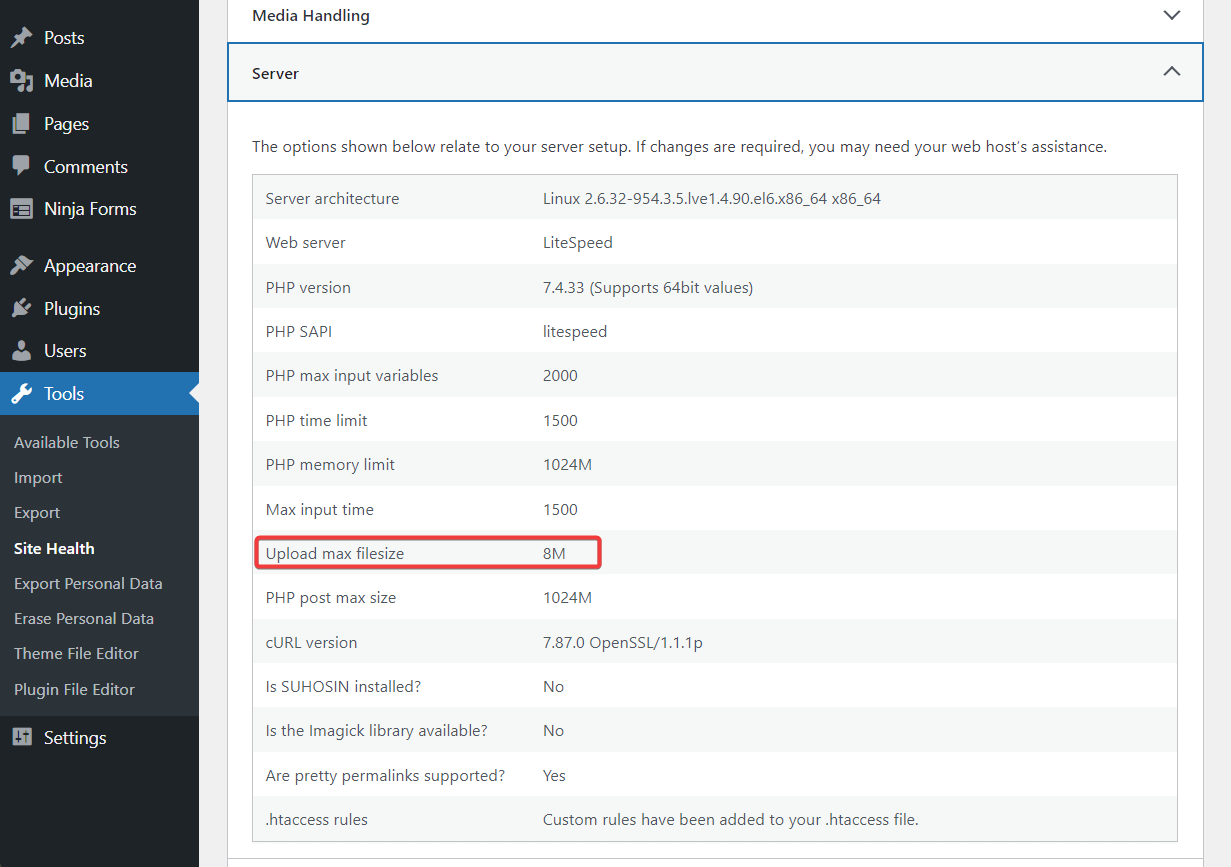
Step 1: Check your site’s current file upload limit
To know the default upload limit for your site, open your WordPress dashboard and go to tool site health Information Server upload max file size,
In the next step, you will learn how to increase your upload limit so that you can upload plugins or themes to your WordPress website.
Step 2: Increase File Upload Size and Execution Time
In this section, you will not only learn how to Increase your default upload size, but also your execution time, The execution time needs to be extended because you are uploading a large file to your server and hence the server will need more time to execute it.
There are three different ways you can increase file upload size and execution time.
You can do this by going to the backend of your site and modifying some values in your .htaccess, php.ini file, or functions.php.
please note that you must modify a single file, not all,
ImportantNote: Before you proceed with the below steps, take a backup of your entire WordPress website. Making changes to your backend is risky, and you might end up with a broken site. The backup will be your safety net. Back up and move forward without fear.
Option 1: Modify .htaccess
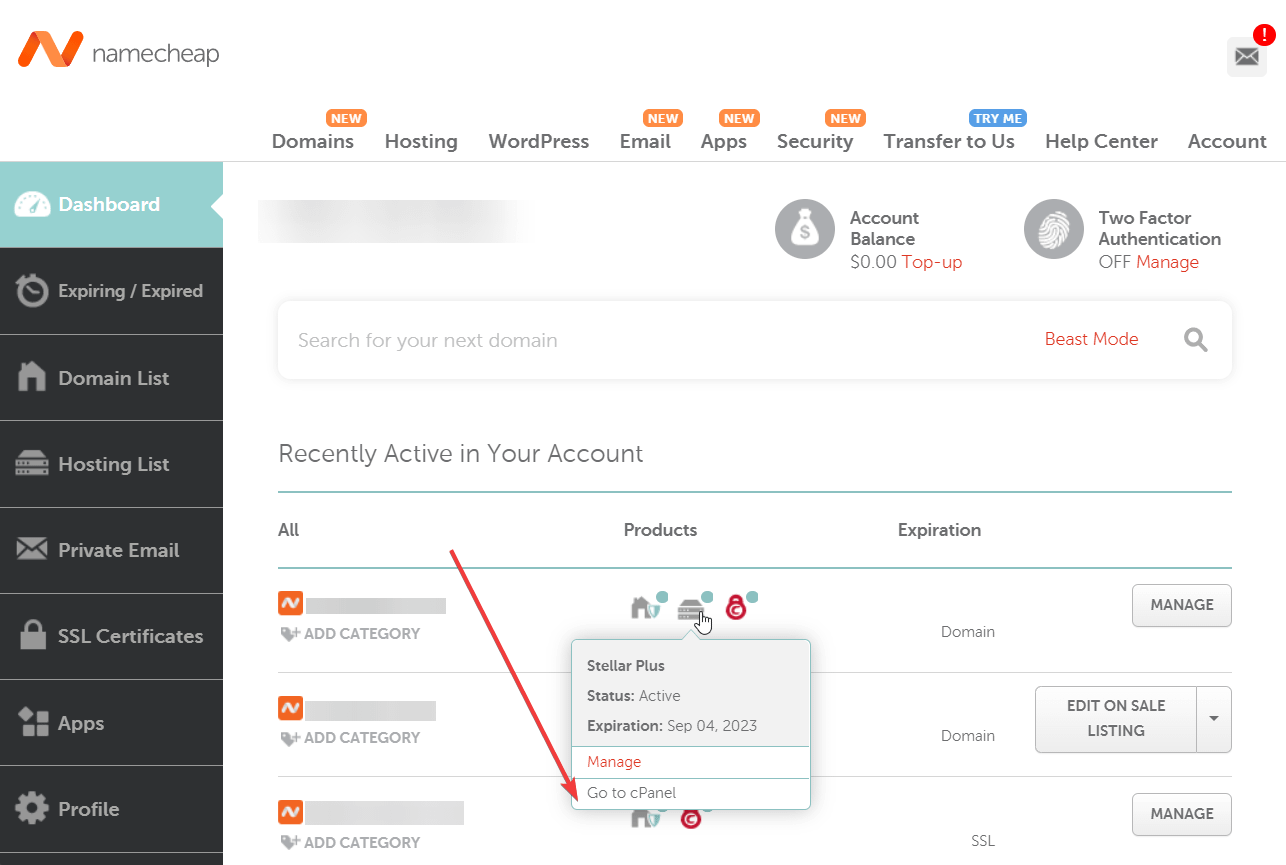
You can access the .htaccess file through your hosting account or by using an FTP client. We’ve covered how to use an FTP client in a separate guide, so in this one, we’ll show you how to access your hosting account.
Open your hosting account, find Cpanel, and go to the file manager,
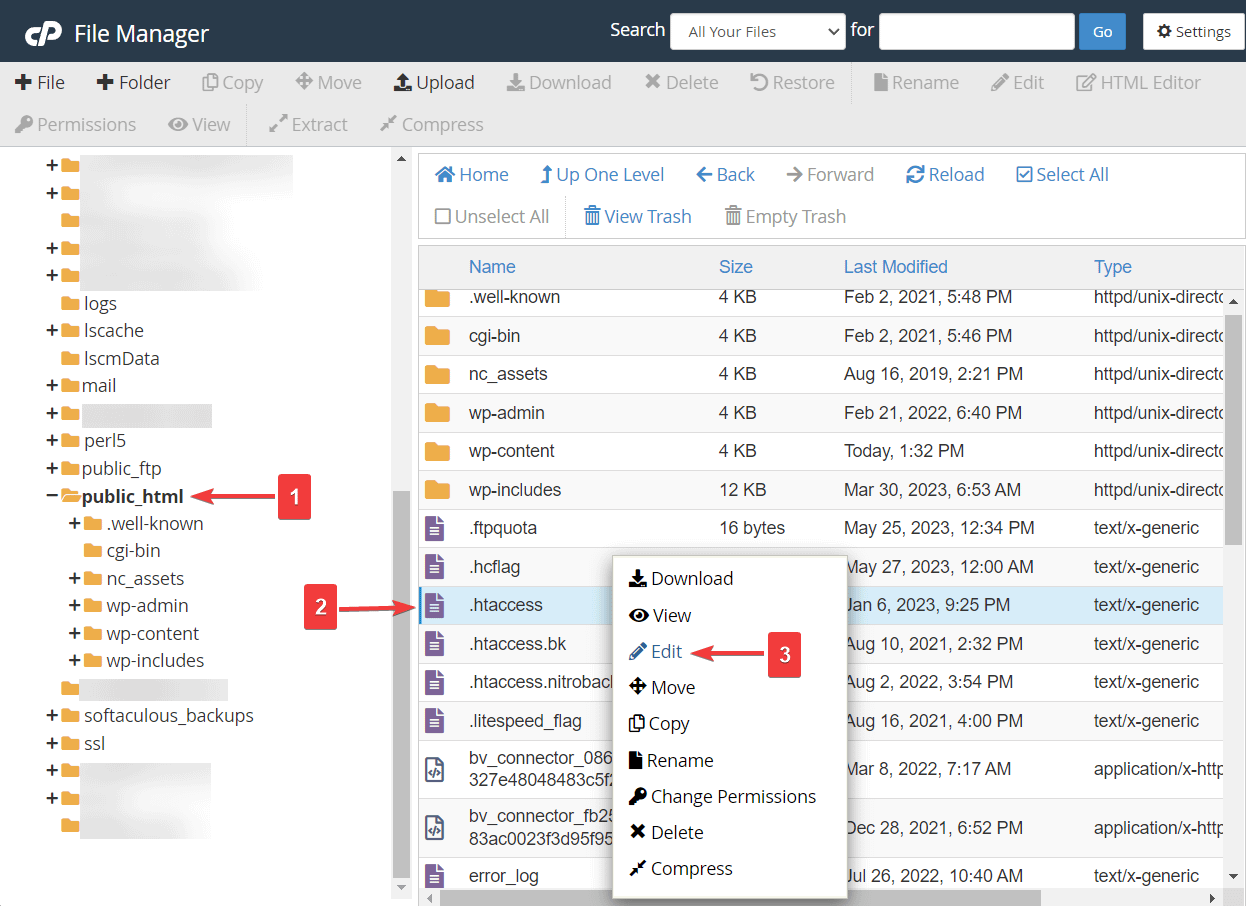
In File Manager, select public_html to locate the folder, and then the .htaccess file inside that folder. Next, right-click on the .htaccess file, select the edit option, and the file will open in a separate tab.
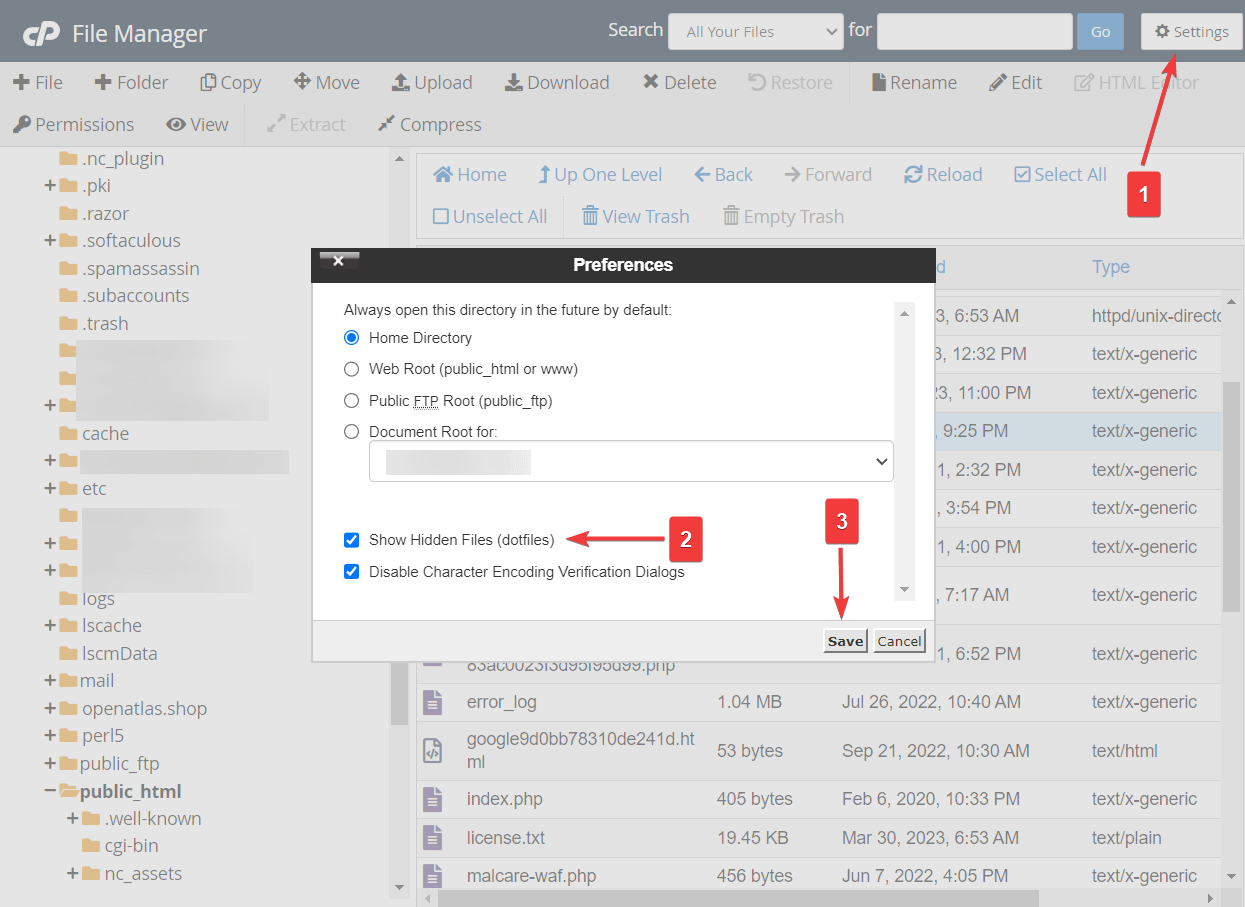
not found .htaccess file? This is because it is hidden. To unhide the file, go to Adjustment your choice file manager choose show hidden files option from the pop-up, and hit the save button.
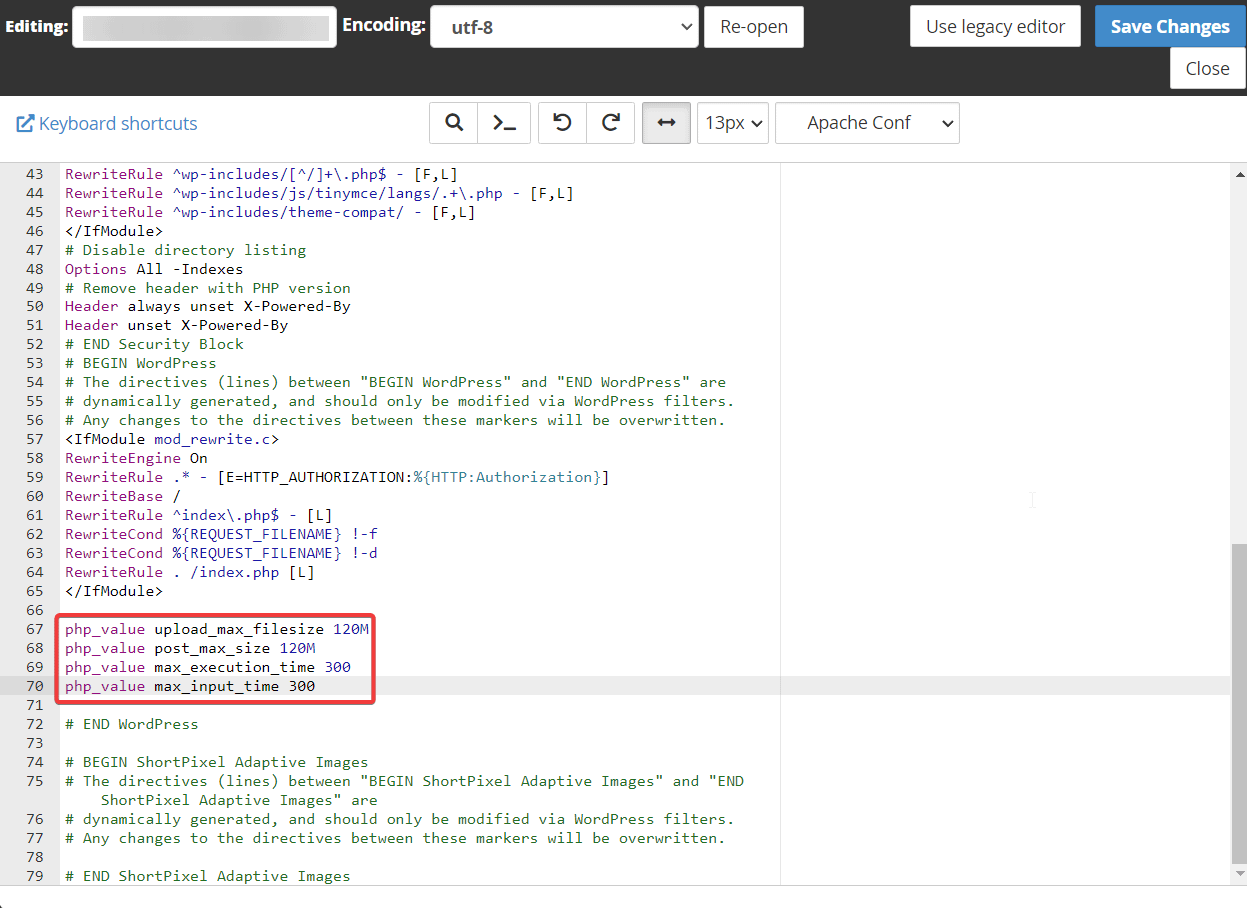
Insert the following code snippet before the “#END WordPress” sentence:
php_value upload_max_filesize 120M

php_value post_max_size 120M

php_value max_execution_time 300

php_value max_input_time 300
Adjust the numbers as per your requirements. then hit the save Changes Exit button and tab.
Option 2: Modify php.ini
Another way to fix “The link you followed has expired” is by adjusting the values in the php.ini file.
Php.ini file is also located in the public_html File manager’s folder, just like the .htaccess file.
Find the file, right-click, select edit and enter the following code snippet:
upload_max_filesize = 120M

post_max_size = 120M

max_execution_time = 300
Adjust the numbersBeat Save Changes button, and exit Schedule.
If your host offers cPanel, you can also find a dedicated php.ini tool there. It lets you modify these values directly from cPanel.
Option 3: Modify functions.php
The function file is a part of your site’s current theme. If you want to use this method, it is necessary that you use a code manager plugin like Child Theme or Code Snippets. Otherwise, your functions.php modifications will be overwritten whenever you update your theme.
We’ll show you how it works with code snippets…
install and activate the Code Snippets plugin on your WordPress website.
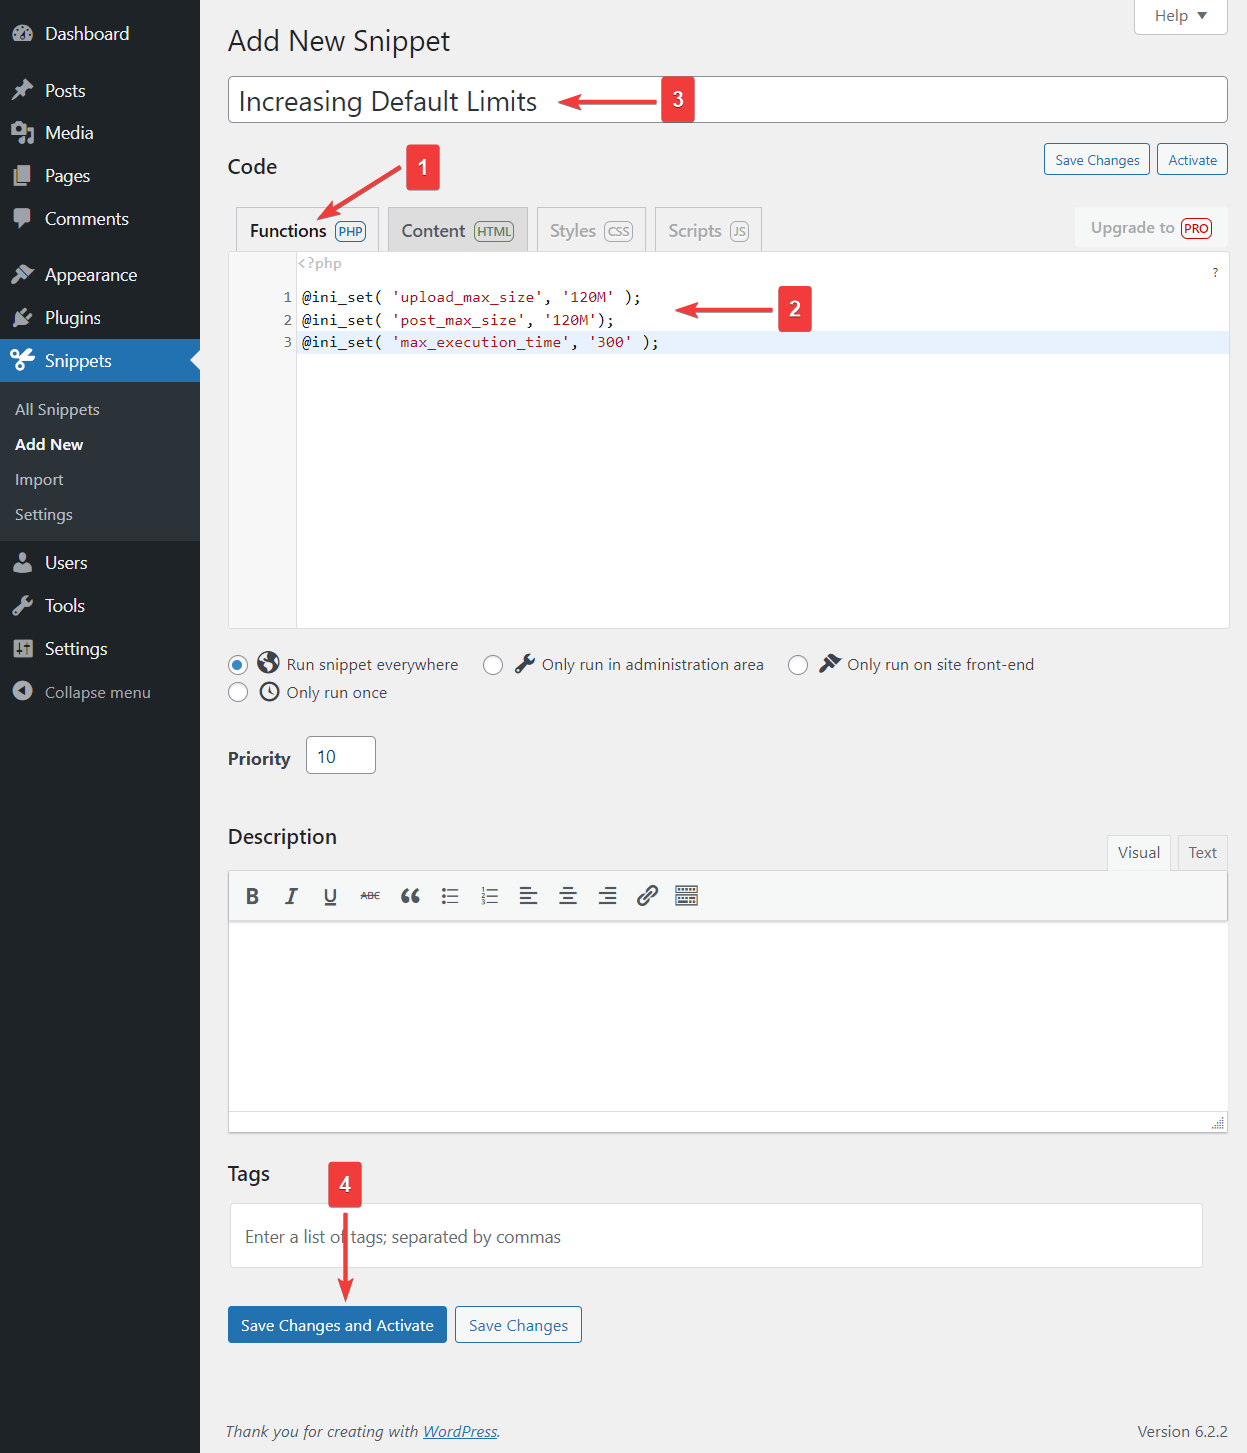
then go to snippets add a new function php And enter the following code In the empty box:
@ini_set( 'upload_max_size', '120M' );

@ini_set( 'post_max_size', '120M');

@ini_set( 'max_execution_time', '300' );
Add a title hit the top of the page save changes and activate the button.
That’s it. Now you have extended your file upload and file execution time limits.
Other measures
Some of you may still face the “The links you followed have expired” error even after increasing the default limit. If so, try the following solutions:
1. Update Your PHP Version
Some WordPress errors occur because your website is running on an older PHP version.
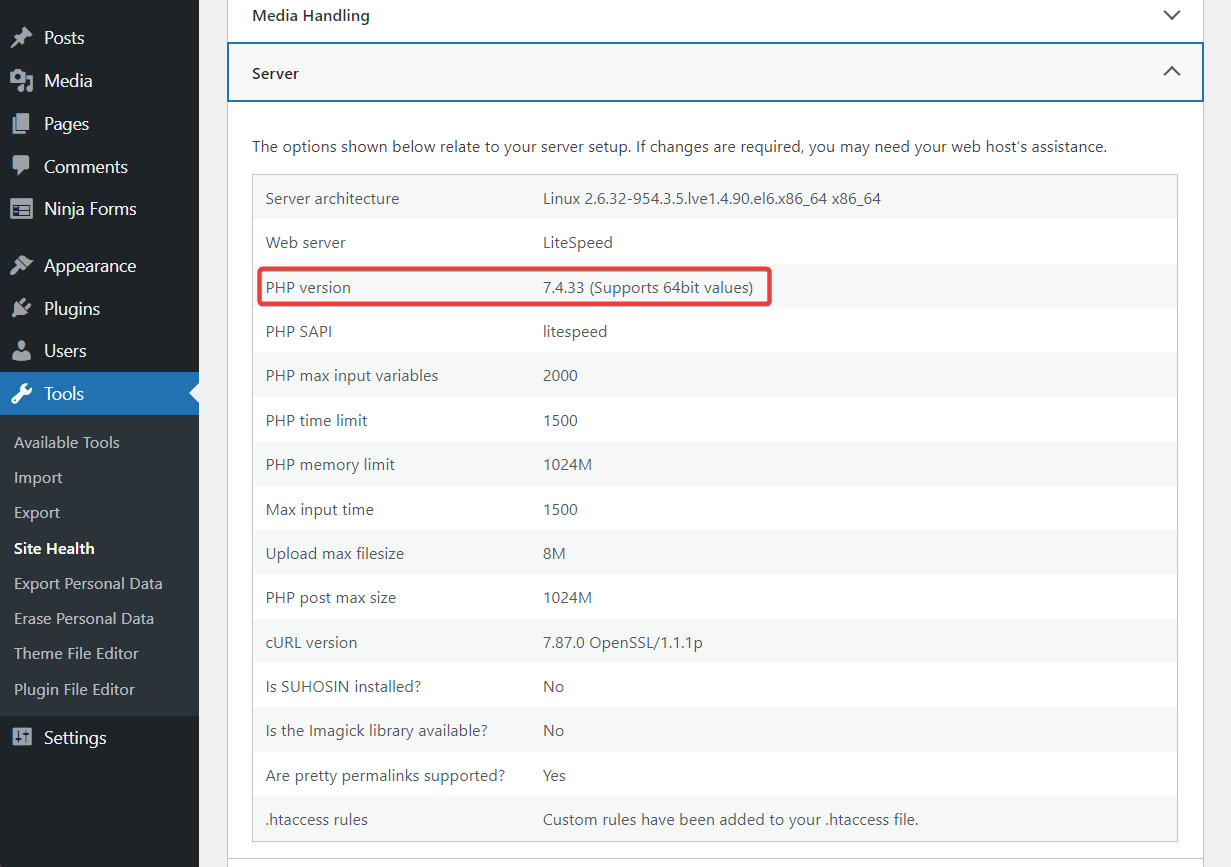
To update your PHP version, you must first check what is the latest version available,
Next, find out what PHP version your website is by going to tool site health Information Server PHP version,
If your site isn’t running on the latest PHP version, here’s how you can upgrade:
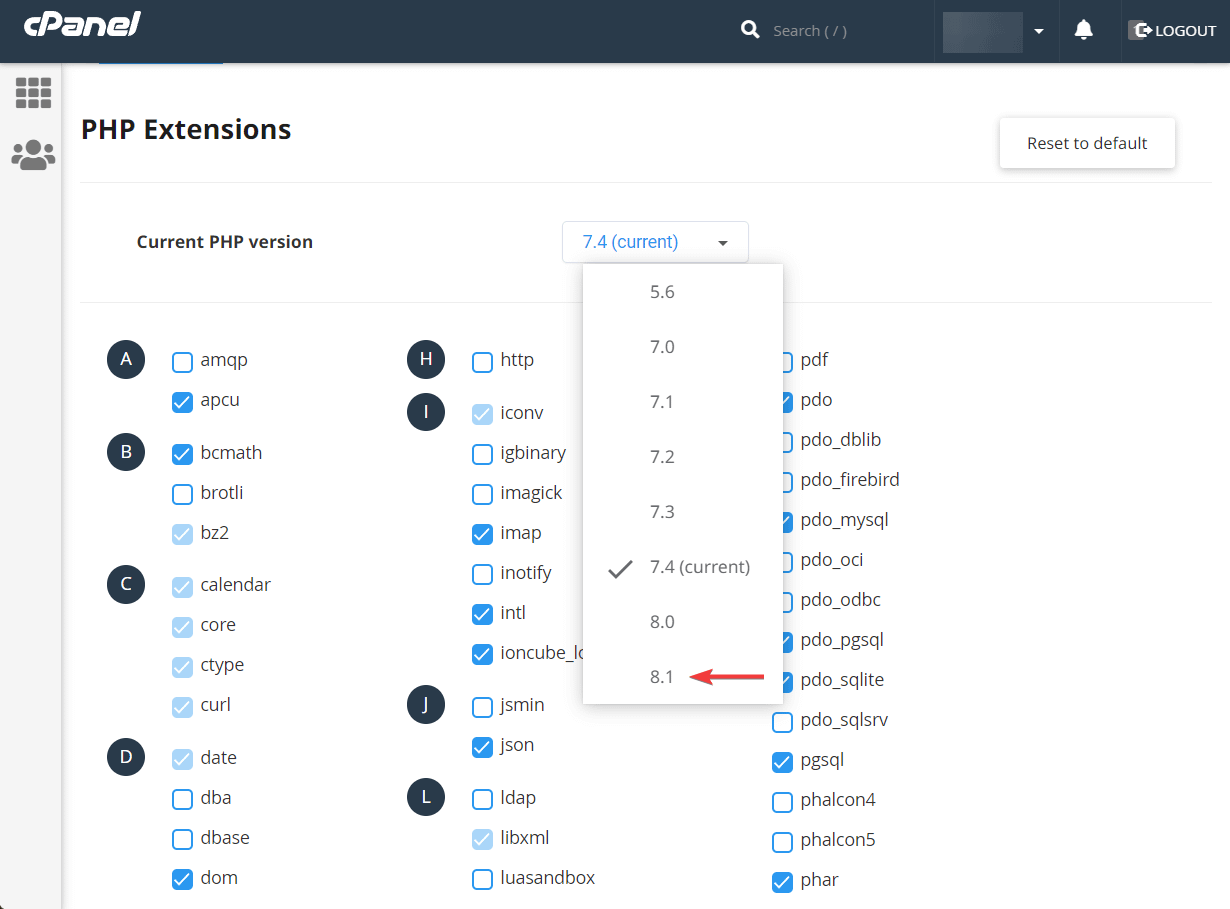
Open and navigate to your hosting account cPanel Select the PHP version,
Select the latest PHP version from the dropdown menu. And all.
Need more help? Check out this guide on how to update the PHP version of a WordPress site.
2. Contact the hosting provider
When nothing works, contact your hosting provider and inform them of all the steps you have already taken. They must have some solutions.
Fix “The Link You Followed Has Expired” Error For Good
“The link you followed has expired. Please try again.” The error usually appears when you are trying to upload a plugin or theme to your WordPress website. On rare occasions, it appears when updating plugins.
The problem is usually caused by a plugin or theme exceeding your host’s default maximum upload size and execution time.
To fix the problem, you need to increment those variables. We showed you three methods to achieve this – .htaccess, php.ini, or functions.php.
For some more tips on fixing common WordPress errors, check out our complete guide to WordPress troubleshooting.